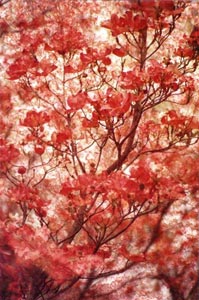
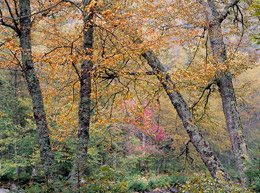
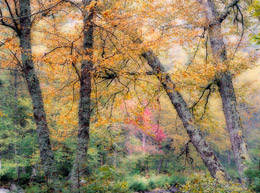
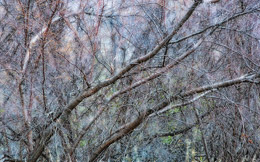
Photography podcast #67 discusses how to use Orton Imagery (AKA the Orton effect or the Orton Technique) to give your photographs an ethereal/painterly feel. This technique was invented by Michael Orton in the mid 1980’s using 2 pieces of overexposed slide film sandwiched together. The principles of this technique can also be used in graphics programs like Photoshop to achieve a similar effect. This podcast contains 2 interviews; one with Michael Orton discussing‚ the technique’s history, and one with Darwin Wiggett,‚ discussing his method for creating Orton Imagery using Photoshop and other graphics programs. Darwin’s step-by-step is outlined below and his Photoshop action is also included. Thanks a ton Michael and Darwin!!
Here’s how to create Orton Imagery Using Photoshop. Portion reprinted from from Orton Imagery — A …œHow to‚ guide for Photographers by Darwin Wiggett. Thanks to Nature Photographers online magazine for allowing me to reprint this.
Digital Technique to Create Orton Images
Here, there are many ways to simulate an Orton slide sandwich. You can do it the same way as outlined above for slides overexposing two separate images and then in the computer stacking the images together in software and blending them. Personally, I prefer to take my existing digitized photos (either from film scans or digital camera files) and running them through the process below to see if they work as …œOrton Images‚.
Here is the step-by-step recipe for making Orton images in Photoshop:
- Open any image you wish to try the technique on. Make a duplicate of the image (Image>Duplicate). Close the original image.
- Lighten the image as follows: Image>Apply Image‚¦ then in the dialog box that comes up change the bending mode to …œScreen‚ and the Opacity to 100%. This will give you an appropriately overexposed image.
- Duplicate this overexposed image (Image>Duplicate).
- Blur this second image (Filter>Blur>Gaussian Blur‚¦ and in the dialog box use a Radius setting of 15 to 50 pixels ‚” the higher the pixel setting the blurrier the photo and the more ‹“painterlyž the image‚¦ but you can go too far!). Experiment with different settings, for my tastes and for the size of my digital files (50–100 megabytes) a radius of about 25 pixels works perfect.
- Now select the move tool from the Photoshop tool bar (or just press …œv‚ on your keyboard for quicker access to the move tool). Hold down the …œshift‚ key and use your mouse to drag and drop the blurry image onto the sharp one (donžt let go of the shift key until after you release the mouse button or the images wonžt be in perfect alignment).
- Bring up the layers palette in Photoshop (F7 is the keyboard shortcut). Under the word …œLayers‚ in the layers palette will be a menu box of blending modes. Change the blending mode from …œnormal‚ to …œmultiply‚.
- Now …œflattenž the two layers by pressing …œCTRL+E‚ or by clicking on the sideways triangle in the layers palette to select ‹“flatten imagež.
There, you now have an Orton image — if you like your new masterpiece save the file!
Copyright Darwin Wiggett and Nature Photographers Online Magazine — All rights reserved.
—————————————————————————————————
Dwayne Oaks from our photography forum also lists the way he uses the Orton effect using NX2 software. Thanks Dwayne.
1-use midtone (levels) slider to brighten photo (2.04)
2-select gaussian blur, set radius slider to (15.85)px and opacity to (100)%
go to blending mode and select (multiply)
3-readjust (levels) sliders if necessary
4-in the case of my work to get the muted colors just turn down
the saturation
Links /resources mentioned in this podcast:
More of Darwin Wiggett’s work on Timecatcher.com
Photographing Creative Landscapes: Simple Tools for Artistic Images and Enhanced Creativity by Michael Orton
Dances with Light by Darwin Wiggett
Download Darwin’s Orton Action
June’s low shooting angle assignment on the Photography.ca forum
See and vote on May 2009’s member images
If you are still lurking on our forum,
feel free to join our friendly ![]() Photography forum
Photography forum
Thanks as always to everyone that sent comments by email about our last podcast. Although ALL comments are appreciated, commenting directly in this blog is preferred. Thanks as well to all the new members of the bulletin board.
If you are looking at this material on any other site except Photography.ca — Please hop on over to the Photography.ca blog and podcast and get this and other photography info directly from the source. I Subscribe with iTunes I Subscribe via RSS feed I Subscribe with Google Reader I Subscribe for free to the Photography podcast — Photography.ca and get all the posts/podcasts by Email
You can download this photography podcast directly by clicking the preceding link or listen to it almost immediately with the embedded player below.
Podcast: Play in new window | Download


