The relationship between shutter speed, aperture size (f-stop) and ISO (sensitivity of the recording material).
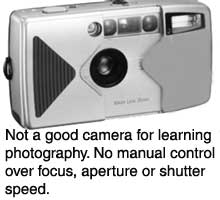
The information in the following sections can be used as a photography primer for anyone with any type of digital or film camera. However, in order to learn how to take creative photos, you must have a camera that you can control. This means a camera with which you can choose the shutter speed, the f-stop and the ISO. Most digital DSLR cameras or 35mm film cameras (Nikon, Canon, Minolta, Olympus Pentax etc.) can do this. Although an automatic point and shoot camera is useful for recording events, you don’t have as much control over it. It is therefore not a great camera for learning photography.

Shutter speed in photography
The shutter, is the part of the camera that opens and closes when you press the shutter release button. While the shutter is open, the scene you’re taking gets passed to the digital sensor or film where it is recorded. The duration of time that the shutter stays open is referred to as the shutter speed. Shutter speeds are some of the numbers that you see in the viewfinder of most DSLR (Digital Single Lens Reflex) cameras while you’re composing your picture. These numbers range in value from as fast as 1/4000 of a second or more to as slow as 1 minute or more.The important thing to remember AND THIS WILL QUICKLY DEVELOP INTO A THEME is that these numbers work in a precise and predictable manner. Let’s say our camera meter tells us that the correct exposure for our scene is F5.6(F-stop explanation coming up shortly) at 1/2 (of a second). This means that the next (full) shutter speed higher, 1 second, lets in two times as much light as 1/2 a second. The next speed, 2 seconds, lets in twice as much light as 1 second. This means that if the camera meter says 1 second, and we ON PURPOSE set the shutter speed to 2 seconds, extra light will hit the digital sensor or film and make the scene too light or overexposed. If the meter says 1 second and we set it at 1/2 a second, not enough light will have passed to the digital sensor or film and the scene will be too dark or underexposed.
An example of a string of full-unit shutter speed numbers: 1/500, 1/250, 1/125, 1/60, 1/30, 1/15, 1/8, 1/4, 1/2, 1, 2, 4, 8, 15 seconds. A shutter speed of 1/2 a second lets in twice as much light as 1/4 of a second. But it lets in HALF as much light as 1 second. The relationship is the same for every number on the scale. 1/125 lets in twice as much light as 1/250 because it stays open for twice the length of time. It lets in HALF as much light as 1/60 because it closes more quickly. Shutter speed choice is dependent on the amount of available light as well as mood you want to create. If you are taking a picture of a waterfall, a fast shutter speed like 1/500 of a second will freeze the scene, but a long shutter speed like 1 second will make the water blur into a soft stream. A good thing to know right up front is that most people cannot hold a camera (with a normal lens [50mm]) steady enough to take a picture at 1/30 of a second or slower (1/15, 1/8,1/4 etc.) This is because your hands are always moving slightly. At 1/60 of a second or faster(unless you’re on a vibrating train or in the middle of an earthquake) the shutter opens and closes fast enough to capture the scene without blur. IF YOU ARE USING A ZOOM LENS HOWEVER, the camera’s lens is heavier, bulkier and less stable and you will need to use an even faster speed like 1/125 or 1/250 when hand holding the camera. The rule of thumb is as follows; 1/the focal length of the lens=the minimum shutter speed to use. Using the zoom lens again, if the zoom is an 80-200mm your safest bet is to use 1/80 as the shutter speed at the 80mm end and 1/200 or faster at the 200mm end.
These rules apply to hand holding the camera. If you affix the camera to a tripod you can shoot pretty much as slow as you like because you are not moving the camera. If the camera is on a tripod though, and you are shooting a standing person, THE SUBJECT IS MOVING SLIGHTLY. So a shutter speed of 1/60 of a second, regardless of the camera lens used would be a safe bet. If the subject is sitting still or lying down (moving less) then you might try 1/30 of a second if the camera is on a tripod. What if you are taking a picture of a baloney sandwich? Baloney sandwiches don’t move (usually). Then you may shoot 1/30, 1/15, 1/8 etc. But which one do you choose? NOW IT’S TIME TO TALK APERTURE SIZE AND DEPTH OF FIELD.
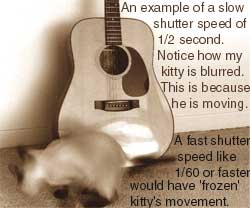
Faster shutter speeds(1/60, 1/125 and faster)will freeze a moving subject such as a dancing kitten. Slow shutter speeds(1/15, 1/8 and slower)will not freeze moving subjects, and you can use this to your artistic advantage. Try taking a picture of moving water and watch the beautiful blurring effect result.
Pages: 1 2


