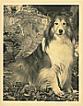
You’ve probably heard the phrase “what’s old becomes new again”. While looking for a toner that would impart a golden, antique look to my dog prints, I stumbled upon tea. I wanted a light, golden brown look; something no one else was using, so late one evening in 93′, I got out the tea bags and created my own home brew and settled in to tint some photos. To my amazement it worked and to this day, the prints my customers purchased are still looking as good as day I printed and tea stained them. Even with the new colored RC papers, I still tea tint when the mood strikes.
Throw Caution to the Wind Theory: Using the rationale that coffee had been used eons ago, I theorized why not tea. I knew that tea was a tannin and thinking that tannin or tannic acid was permanent, I threw caution to the wind and started tinting my images in tea. As for the million dollar question; is tea tinting really archival? Apparently there are conflicting theories. I’ve done some recent research on the internet, sent a few e-mails here and there, the staff put their feelers out, but alas, no concrete evidence that this process is archival. It was suggested I conduct a test by covering one half of the print with black paper and leaving the other half exposed in bright sunlight for 90 days. I’ll be posting the results, so in the meantime, buy a box of tea bags and give it a whirl. If you don’t like the results, it’s the perfect time of year for iced tea!
Supplies you’ll need:
1. Tea bags (Lipton or generic, large or small). Lipton’s combines orange pekoe and pekoe cut black tea. Our generic brand contains orange pekoe teas and select teas (whatever that may be). I’m using Lipton tea, but try both. Flavored tea bags (i.e. raspberry) do not stain the print a nice pink hue. OK! Call me crazy, but I tried it.
2. Semi-matte, resin coated paper if you plan to color otherwise any RC paper, EXCEPT FOR GLOSSY. Tea staining washes right off glossy RC. All papers stain a different hue. I use Agfa semi-matte and Ilford RC papers. Fiber papers are notorious for blotchy, uneven stains.
3. Pan to boil water in and add bags.
4. Stove. Microwaves do not work because the temperature will break the bags.
5. Your usual trays and chemicals.
Process:
This process is a guide only. Feel free to strike out on your own with different ratios of tea bags to water and temperature. The amount of water and number of tea bags you use is dependent upon the size of your tray. The bigger the tray, the more water and tea bags you will need. An 8x10 or 10x10 tray takes approximately 20 oz. of the liquid tea, but you can use less. Just remember to use enough to cover your print and agitate continuously. This is a one-time liquid. I haven’t found that the liquid keeps its strength stored overnight and I know the tea bags can’t be re-used. Make the tea while your print(s) are washing or make it prior to developing your prints. Again, this is only a guide.
1. For a 10 x 10 tray, fill a pan with 20 oz. of water and add 8 to 10 regular size tea bags (take off the tags). This is a starting point and you can add more bags if you want a deeper hue.
2. Bring just to a boil, take the liquid off the stove, and take bags out.
3. Pour the hot liquid into your tray and add just enough clear water to the liquid to register a temperature of between 80 and 90 degrees. The combination of heat and the number of tea bags in relation to water, are the major factors in determining the color of the staining from a light ivory (75 , 80 degrees), to gold-brown (80–85), to a brownish orange (90 and over). Red Alert , 90 and over; you’re pushing it — maybe not now, maybe in a short while, but definitely, in the long run, your print will probably disintegrate, not to mention ugly, uneven blotchy stains.
4. Slip your print into the tray and agitate constantly. Keep in liquid until WYSIWYG (4–5 minutes or longer). The print rarely dries darker.
5. Wash and let print dry. RE-HEAT liquid in original pan when the temperature has dropped below 80 degrees (the liquid cools rapidly in the tray, so re-heat often. (Don’t add any more water). After re-heating, pour the liquid back into the same tray, take it’s temperature and continue tinting more prints. The liquid can be re-heated until the tea is exhausted.
Prognosis Print: I’ll be watching my print to see if there is any change in color, density, etc. and if it remains unchanged, then you can rest assured that tea staining might be used to archive a print. Even if it doesn’t turn out that way, it’s an economical, fun way to add color to your prints. Don’t forget to add a bit of handcoloring. Wish me luck and if anyone has any helpful information on tea staining, feel free to let all of us know.
© By Dee Ross Pure Imageswww.dee-ross.com


