Loading

Lith printing in photography – Photography podcast #39

Photography podcast #39 features an interview with fine art photographer Vicki Reed aka holgagirl on Flickr. In this interview we talk about lith printing which is an alternative printing technique using a traditional darkroom. For those that only want to try this digitally, see the links below.
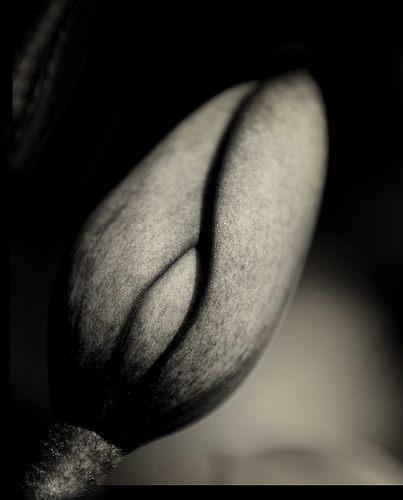

Sumac and Sun – Vicki Reed

Photography links mentioned in this podcast:
Vicki’s feature on Photography.ca
Holga cameras
Fotospeed lith paper Do a search for lith on this site to get more lith products
Kentona paper
2 Tim Rudman videos on Lith printing
The World of Lith Printing
Digital lith printing
Digital lith printing action for photoshop
Digital lith printing by Adobe

Is it still art – what is art – thread on photography.ca forum

Thanks as always for the comments by‚Gary H,‚‚seyDoggy, Yves Janse and Mikael. We LOVE comments and suggestions so please send more.

You can download this photography podcast directly by clicking the preceding link or listen to it almost immediately with the embedded player below.

One light portraits – Photography podcast #38

Photography podcast #38 talks about creating dramatic portraits using only 1 light. Using 1 light creates very harsh shadows which is PERFECT for a dramatic portrait. The following 2 shots illustrate this dramatic effect. In the first shot Lorne and Boog are being lit by 1 light located 45 degrees toward the right. The second shot is sidelight. Both these shots use no reflector to bounce light back into the subjects’ faces. Note that the light in the second photograph reveals a lot of skin texture, so this type of lighting would not be good for a ‘fashiony’ shot in most cases. Thanks to Lorne and Boog for being the models. I Love how little Boog is staring me down in the first shot. You can click all the shots to make them tastier on the eyes.

One light portrait

1 light portrait - side lighting

You can download this photography podcast directly by clicking the preceding link or listen to it almost immediately with the embedded player below this image.

Photo of the week
This week, the photograph is by Zseike and I comment in the podcast on why I think this photograph is fantastic.

Photo by Zseike

Thanks as always for the comments by‚Gary H, ‚Andre, Tom, Yves Janse, David and Mikael. We LOVE comments and suggestions so please send more.

Freezing and Melting

It’s funny how‚various photography techniques can resurface at any moment depending on what you are looking at….Given the infinite variety of things to see, it means that there is never a lack of subjects to photograph.

I guess this shot was inspired by the macro on the cheap podcast but it’s not a macro shot at all. It’s a simple lower angled shot of some melting ice but for some reason its shape intrigues me. When‚I first looked at it, it‚seemed like a mini model of something larger. It was photographed using the long end of my 70-200mm zoom. There was actually water moving through the ice that unfortunately‚I was unable to capture because‚I needed a slower speed and it was too bright…and oh yeah, I forgot my filters like a bonehead. Still, there’s something here that pleases me.
Exif Data – ISO 100 – F-32 1/6. You can click the image to make it tastier on the eyes.

Stairway to Heaven ……..nope

What is going on here?‚

Where does the ladder go?

Are there treats at the end of the ladder?

This photograph is an excellent example of lens compression. For those that may not know, longer lenses tend to compress the foreground and background while wide angle lenses tend to do the reverse. I shot this scene on 1 frame from about 50 feet away. The white in the background is actually a massive container filled with oil and the ladder is part of that container. The tree is actually about 20 feet in front of the container.

I shot this scene from my car while snow was lightly falling. Exif data – Shot at ISO (The light was quickly fading)‚1000 F-16 at 1/400 at the long end of my 70-200 zoom lens. You can click the image to make it tastier on the eyes.

Macro photography on the cheap – Photography podcast #37

Photography podcast #37 focuses on cheap macro photography setups. In this podcast we talk about using reversing rings, extension tubes, close-up lenses and cheap macro lenses in order to achieve good macro results for little cash.‚Special thanks to ‚Yves Janse who suggested this podcast.

The following images describe the different inexpensive techniques used to create macro photographs

macro photography

1 – Shows my shot with a zoom lens only
2 – Shows shot with cheap close-up lens #1
3 – Shows shot with cheap close-up lens #2
4 – Shows shot with cheap close-up lens #4
5 – Shows what close-up lenses look like
6 – Shows what extension tubes look like
7 -‚Shows what a lens mounted backwards using a reversing ring looks like
8 – Photo by Yves janse (Thanks Yves) showing how you can stack close up lenses and tubes
9 – Shows a Plamp for holding macro subjects

Links mentioned in this podcast:
Reversing rings on Ebay
Close up lenses on Ebay
Extension tubes on Ebay
Phoenix AF lens review (A cheap dedicated macro lens)
Plamp clamp for holding macro subjects

Thanks as always for the comments by‚Al, Tim and Yves Janse who also suggested this. We LOVE comments and suggestions so please send more.

2 old bananas huddle for warmth in the snow

Much to my delight someone tossed out 2 old bananas. Then I came upon them and decided “hey bananas in the snow, cooool”

The first shot‚shows the real bananas and the second shot‚shows the bananas after having frozen to death. OR… the second shot shows stillborn oxygen deprived bananas.

Kidding aside all‚I did to get the deep blue in the second shot was push the hue/saturation slider all the way to the right in photoshop. Shot at F5.6 at 1/200 ISO 100. Click the images to make them bigger, and of course…you are invited to comment.

Backup your photos – CLONING your hard drive

There is no computer malfunction as devastating as losing the contents of your hard drive. This can happen due to a virus, or a hardware or software malfunction. Backing up your computer regularly is a must and there are several ways to do it. The most common way is to use a program that breaks up the contents of your hard drive into chunks and save it on another external hard drive. In case of hard drive failure, you can rebuild your old drive with those chunks.

Thatžs not the way I like to do it as my first line of defense. I confess, I still do backup that way as well, but itžs not my primary way. Call me neurotic or squeamish but I donžt like chunks.

If my hard drive fails and I have something important to do, I want to have an EXACT COPY of my hard drive already saved. I donžt want to have to rebuild anything or look for a disk to reboot my computer with the saved chunked data. It should still work of course (as long as the internal hard drive is not irreparably damaged) and eventually you have to deal with the computeržs problem internal drive, but who wants an ulcer? Frankly Ižll pay a wee bit for piece of mind.

The answer is to make a clone, a copy, or an exact intact image of your hard drive. That way, I can just take my external drive (which is a clone of my desktop) attach it to old 50 dollar laptop via USB and boom ‚” my whole computer shows up as a new drive on my laptop. No need to look for any disks or reassemble chunks and ZERO downtime and zero lost files.‚

Herežs how I do it. I buy an external drive that is the exact same size as my computeržs internal drive. That way when I clone the drive, I clone it exactly. You should know that that backup external drive can ONLY be used for backup in this way. You canžt save other files on that external drive, you can only save the clone of your internal hard drive. Each time you re-backup your computer onto that external, it deletes the previous backup. My 500 gig internal drive takes about 1.5 hours to clone onto the Western Digital 500 gig external drive (which costs $130.00 dollars 3 monts ago) via firewire (you can of course use USB).

There are many programs that can do this but the one I use and like best is Acronis True Image 11. It costs about 50 dollars and you can try it for free. When you load it up youžll see different choices on how to backup. To clone your hard drive DO NOT CHOOSE BACKUP AND RESTORE. That option backs up your hard drive in chunks. Instead choose DISK UTILITIES and then Clone Disk. I use manual mode after that and follow the prompts carefully and I MAKE SURE TO ‹”KEEP DATAž WHEN IT ASKS HOW I WANT TO MODIFY MY OLD DRIVE AND I CHOOSE ‹”AS ISž (because both drives are the exact same size) when it asks how I want to move data from the old to new drive.

The other program I am somewhat familiar with that does just about the same thing is Norton Ghost. Again to make an exact copy of your drive (non-chunk) donžt choose Back it up now, instead choose Copy My Hard drive (advanced) and follow the prompts very carefully.

Using either of these methods gives you the peace of mind that even if your hard drive crashes in a terrible way, you can still work from a new computer by plugging your external into it. Obviously, youžll need to copy or clone your internal drive regularly to have the freshest copy. If you have irreplaceable photos and other files on your internal hard drive, it is also safest to burn them to CD or DVD.