Photography podcast #36 focuses on thinking about how different types of light suit different types of faces. We talk about how both short lighting and side lighting are good for rounder faces. We also talk about blemishes and baldness.
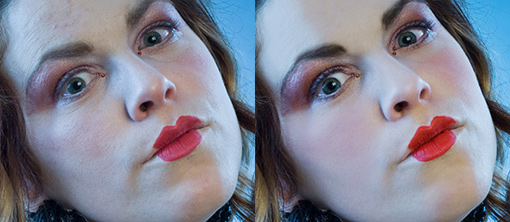
Many thanks to Mark McCall for allowing me to use this image (and explanation below the image) clearly showing the the slimming effect of short lighting and the broadening effect of broad lighting on a model’s face.
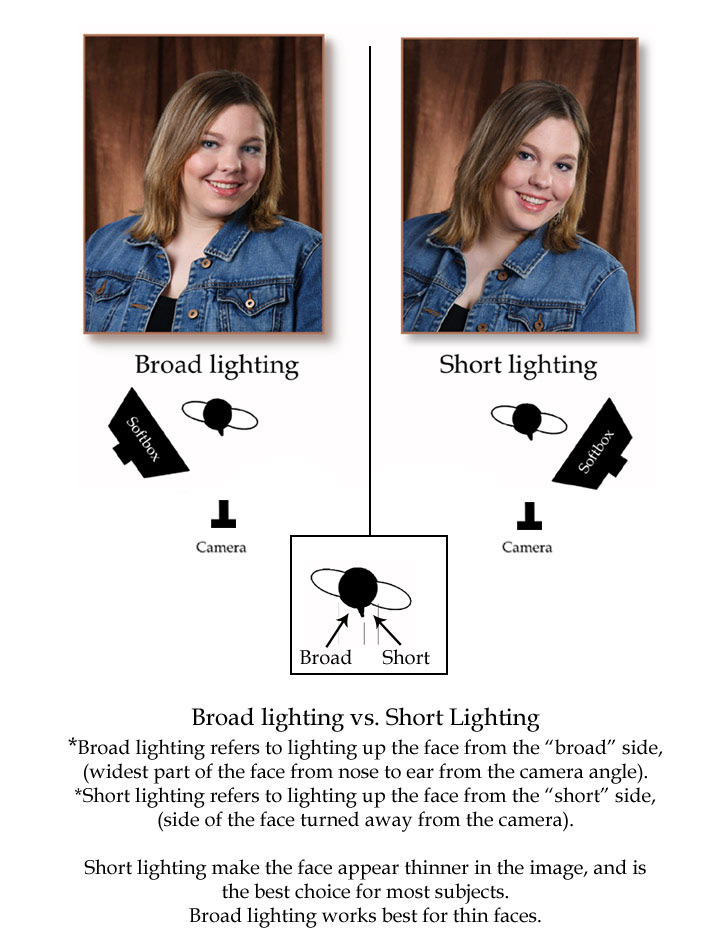
Broad Lighting vs. Short Lighting
Broad lighting refers to lighting up the face from the “broad” side, (widest part of the face from nose to ear from the camera angle).
Short lighting refers to lighting up the face from the “short” side, (side of the face turned away from the camera)
Short lighting makes the face appear thinner in the image, and is the best choice for most subjects. Broad lighting works best for thin faces.
Thanks as always for the comments by Yves Janse and Mikael. We LOVE comments and suggestions so please send more.
Podcast: Play in new window | Download