Page 3 of 3 FirstFirst 123
Results 21 to 29 of 29

Help on avoiding colour casting appreciated - some examples

This is a discussion on Help on avoiding colour casting appreciated - some examples within the Critiques forums, part of the Photography & Fine art photography category; Thanks Iguanasan, I currently use a free program for limited correction PAINT.NET - it has many plugins designed by it's ...

  1. #21
    simon007 is offline Junior Member
    Join Date
    Apr 2012
    Posts
    16
    My Photos
    Please feel free to edit my photos
    Critiques
    Critique my photos anywhere in the forum

    Default

    Thanks Iguanasan,

    I currently use a free program for limited correction
    PAINT.NET - it has many plugins designed by it's users.
    ie COLOUR MIXER, COLOUR BALANCE, WHITE BALANCE.

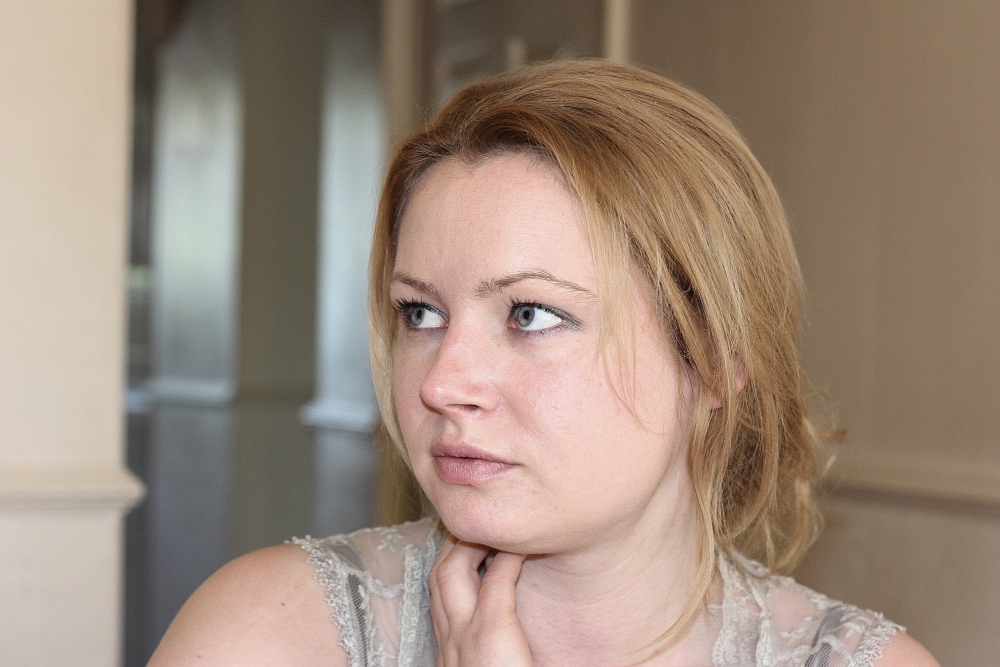
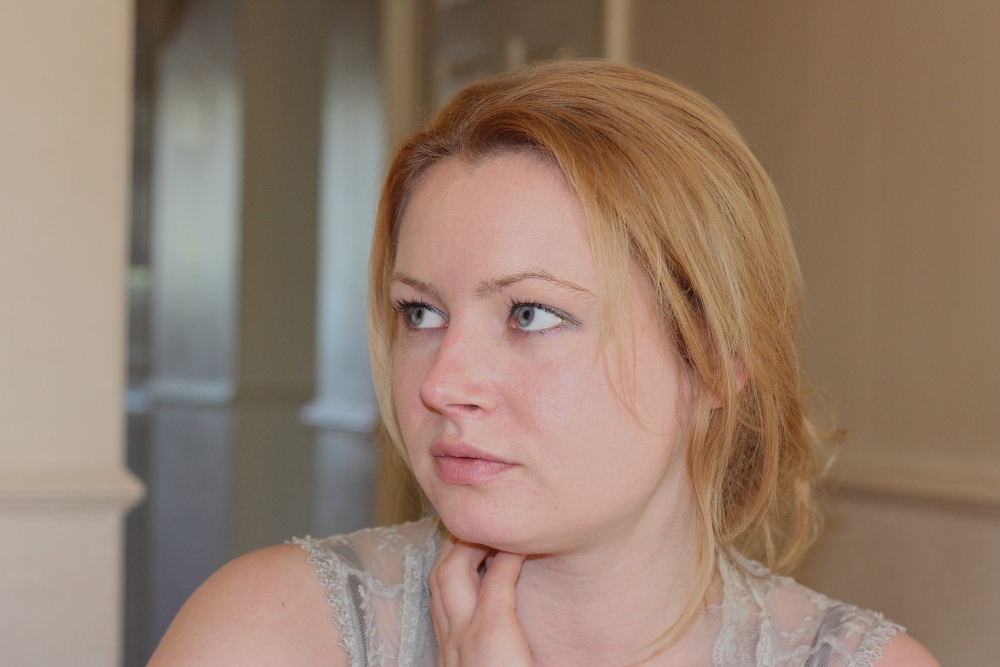
    to finish this subject off, here 3 images, 2 with a bit of correction I attempted with PAINT.NET. They don't seem too bad, can photoshop
    and professional software do any better with the colour balances?


    Name:  IMG_1588.jpg
Views: 217
Size:  195.5 KBName:  IMG_1588a.jpg
Views: 237
Size:  196.8 KBName:  IMG_1588ab.jpg
Views: 224
Size:  245.0 KB

  2. #22
    Marko's Avatar
    Marko is offline Administrator
    Join Date
    May 2005
    Location
    Montreal, QC. Canada
    Posts
    14,870
    My Photos
    Please do NOT edit my photos
    Critiques
    Critique my photos anywhere in the forum

    Default

    If shot 3 is the original, to my eye it's the best of the 3. It looks natural to me.

    I do see that there are some skin blemishes in shot 3 that are hidden with the colour cast in shots 1 and 2 - but a colour cast is not the correct way to soften skin.
    Softer light is the best way, avoid sidelight which reveals skin texture....then there are pluggins and the use of the sharper/blur tools.

    Photoshop is simply AWESOME. You can learn it easily in a week with online tutorials that are free or at Lynda.com or KelbyTraining.com | The Leading Provider of Education for Photography and Creative Professionals Worldwide for about 25.00 a month to watch fab video tutorials.
    There is a beta version of Photoshop CS6 that is out now that is FREE. I have been using it now for 2 weeks and it works very well. Adobe Labs | Previews, prereleases and beta software from Adobe

    Both shots 1, 2 are magenta to my eye.
    Hope that may help.
    - Please connect with me further
    Photo tours of Montreal - Private photography courses
    - Join the new Photography.ca Facebook page
    - Follow me on Twitter http://twitter.com/markokulik
    - Follow me on Google+ https://plus.google.com/u/0/111159185852360398018/posts
    - Check out the photography podcast


    "You have to milk the cow quite a lot, and get plenty of milk to get a little cheese." Henri Cartier-Bresson from The Decisive Moment.

  3. #23
    Andrew is offline Senior Member
    Join Date
    Jun 2009
    Location
    Victoria, BC. Canada
    Posts
    444
    My Photos
    Please ask before editing my photos

    Default

    Two words.....Grey Card.

    If you are trying to understand WB you need to be aware of the basics. What different light sources do(alone and combined) and what you are seeing with each change you make. You're not there yet. "mixed things to try and get a good outcome" is your problem. By the results I'd have to guess you also changed settings other than WB.

    Put everything back to factory defaults and start over....slowly. Understand what the camera does and what the effects will be before you make the option selections.

  4. #24
    Iguanasan's Avatar
    Iguanasan is offline Moderator
    Join Date
    Jan 2009
    Location
    Halifax, NS
    Posts
    10,917
    My Photos
    Please feel free to edit my photos
    Critiques
    Critique my photos anywhere in the forum

    Default

    Quote Originally Posted by Andrew View Post
    Two words.....Grey Card.

    If you are trying to understand WB you need to be aware of the basics. What different light sources do(alone and combined) and what you are seeing with each change you make. You're not there yet. "mixed things to try and get a good outcome" is your problem. By the results I'd have to guess you also changed settings other than WB.

    Put everything back to factory defaults and start over....slowly. Understand what the camera does and what the effects will be before you make the option selections.
    Great advice!
    “If you are out there shooting, things will happen for you. If you’re not out there, you’ll only hear about it.” – Jay Maisel
    ~~~~~~~~~~~~~~~~~~~~~~~~~~~~~~~~~~~~~~~
    Feel free to edit my shots ONLY for use on this forum and critique my shots in ANY discussion area.
    Flickr | Blog | Google+

  5. #25
    simon007 is offline Junior Member
    Join Date
    Apr 2012
    Posts
    16
    My Photos
    Please feel free to edit my photos
    Critiques
    Critique my photos anywhere in the forum

    Default

    Quote Originally Posted by Andrew View Post
    Two words.....Grey Card.

    If you are trying to understand WB you need to be aware of the basics. What different light sources do(alone and combined) and what you are seeing with each change you make. You're not there yet. "mixed things to try and get a good outcome" is your problem. By the results I'd have to guess you also changed settings other than WB.

    Put everything back to factory defaults and start over....slowly. Understand what the camera does and what the effects will be before you make the option selections.
    I do understand basic camera funtions / principles.

    ie LOW light = raise ISO, slow shutter speed down, widen aperture ( low f number ).
    a slower shutter speed with raised ISO and wide aperture
    will make image overexpose
    very slow shutter speeds will blur image.........

    is this correct?

    If so I will need to learn more.
    The GREY CARD seems a good idea,
    What GREY CARD should I buy and how do I use it properly?
    Most advice so far when I have searched the net seems to suggest
    a GREY CARD rated at 18% ( some suggest 3 colour cards of WHITE, BLACK and GREY ).

    Simon

  6. #26
    simon007 is offline Junior Member
    Join Date
    Apr 2012
    Posts
    16
    My Photos
    Please feel free to edit my photos
    Critiques
    Critique my photos anywhere in the forum

    Default

    I have read up on USING a grey card.
    Tell me if I have got it right.
    1 - Take a photo with Grey card in centre of image. ( use METERING mode (any ) or AF manual focus to FOCUS on a point where the GREY card is )
    2 - Select MENU - Custom WB - Select photo with GREY card.
    3 - Select WB on camera and select Custom WB.

    Is this right?

    By the way is there much difference between METERING modes and AF AUTO / Manual options?
    It seems both could be used for custom WB.

  7. #27
    simon007 is offline Junior Member
    Join Date
    Apr 2012
    Posts
    16
    My Photos
    Please feel free to edit my photos
    Critiques
    Critique my photos anywhere in the forum

    Default

    I have just found that LIVE VIEW is a good way of setting the WB.
    It's shows what the camera sees and allows me to change WB and see
    the differences there and then.

    Simon

  8. #28
    Marko's Avatar
    Marko is offline Administrator
    Join Date
    May 2005
    Location
    Montreal, QC. Canada
    Posts
    14,870
    My Photos
    Please do NOT edit my photos
    Critiques
    Critique my photos anywhere in the forum

    Default

    Sorry about the formatting here....

    Quote Originally Posted by simon007 View Post
    I do understand basic camera funtions / principles.

    ie LOW light = raise ISO, slow shutter speed down, widen aperture ( low f number ).
    a slower shutter speed with raised ISO and wide aperture
    will make image overexpose
    very slow shutter speeds will blur image.........

    is this correct? This is partially correct. When the exposure is correct, there is no over-exposure. very slow shutter speeds won't blur everything unless you are handholding the camera at a very slow shutter speed. Put it on a tripod and anything that does not move (like a rock) should be sharp

    If so I will need to learn more.
    The GREY CARD seems a good idea,
    What GREY CARD should I buy and how do I use it properly?
    Most advice so far when I have searched the net seems to suggest
    a GREY CARD rated at 18% ( some suggest 3 colour cards of WHITE, BLACK and GREY ).

    Simon
    Quote Originally Posted by simon007 View Post
    I have read up on USING a grey card.
    Tell me if I have got it right.
    1 - Take a photo with Grey card in centre of image. ( use METERING mode (any ) or AF manual focus to FOCUS on a point where the GREY card is )
    2 - Select MENU - Custom WB - Select photo with GREY card.
    3 - Select WB on camera and select Custom WB.

    Is this right? This is correct in principle, the steps may vary from camera make to camera make. But you can ALSO just use the grey card to determine the exposure, in fact that would be its primary use and the reason it was created.

    By the way is there much difference between METERING modes and AF AUTO / Manual options?
    It seems both could be used for custom WB.
    There is a big difference between metering modes but they are given different names according to what camera you have. Spot metering for example is vastly different than the default metering setting that comes with the camera - this should be well explained in your camera manual. Auto AF, stands for auto-focus which has nothing to do with exposure. Focusing manually also has nothing to do with exposure. But the metering modes available to AF or manual mode should be the same

    Hope that may help -
    - Please connect with me further
    Photo tours of Montreal - Private photography courses
    - Join the new Photography.ca Facebook page
    - Follow me on Twitter http://twitter.com/markokulik
    - Follow me on Google+ https://plus.google.com/u/0/111159185852360398018/posts
    - Check out the photography podcast


    "You have to milk the cow quite a lot, and get plenty of milk to get a little cheese." Henri Cartier-Bresson from The Decisive Moment.

  9. #29
    simon007 is offline Junior Member
    Join Date
    Apr 2012
    Posts
    16
    My Photos
    Please feel free to edit my photos
    Critiques
    Critique my photos anywhere in the forum

    Default

    Quote Originally Posted by Marko View Post
    ohh these are strong casts....even the corrected version is very magenta.
    Question 1 - are you shooting these with AWB (automatic white balance) - if not what balance are you using?
    Question 2 - what is the predominant light source here (window light?) Are there additional light sources?
    --------

    MARKO and all,

    Sorry to continue this thread ( if your getting bored )

    How would you more seasoned campaigners had done this room.
    Both with the equipment I shall list and your choice of equipment.

    The 3rd and 4th images on page 1 are what the room looked like and the window
    is where the Sun beamed in ( mixture of brightness/ intensity ).
    I used my Canon EOS 450D with kit lens and briefly with my 50mm 1.8 Prime lens.
    I had a Jessops ( 3rd party ) Flashgun with bounce flash SWIVEL and Up/Down upto 90 degrees,
    flash power rating of 34m. I did try to use the flash both on the camera and off ( slave ) plus
    at times both ON-camera and SLAVE ( same time ).

    Simon

    PS: The room was probably a bit lighter than the images in 3 and 4 show.

Page 3 of 3 FirstFirst 123

Bookmarks

Posting Permissions

  • You may not post new threads
  • You may not post replies
  • You may not post attachments
  • You may not edit your posts
  •  

1 2 3 4 5 6 7 8 9 10 11 12 13 14 15 16 17 18 19 20 21 22 23 24 25 26 27 28 29 30 31 32 33 34 35 36