Results 1 to 8 of 8

HDR how do you cope with the extended range?

This is a discussion on HDR how do you cope with the extended range? within the Digital photography forums, part of the Photography & Fine art photography category; ...

  1. #1
    ericmark is offline Senior Member
    Join Date
    Feb 2010
    Location
    North Wales. Near Chester and Wrexham
    Posts
    293
    My Photos
    Please feel free to edit my photos

    Default HDR how do you cope with the extended range?

    When I say HDR I mean high dynamic range not local tone mapping which is used on many HDR images to return the punch lost during the HDR process.

    So be it a single RAW image processed for high lights and shadows then re-combined or two or more images with a typically +2 or -2 EV between them the question is how to combine and make them look natural.

    There seems to be 101 ways with Photoshop to combine the images. The latest I have used I list how.

    Be it the same RAW image exposed for foreground and back ground or a pair of images from a HRD sequence this method allows one to combine best of both.

    Load the images into Photoshop and make a copy of the lighter image. Turn the copy to black and white by simply moving the Image/Adjustments/Hue-Saturation/Saturation to zero. With levels bring the right hand pointer back until you have white out of the lighter areas. Next open Filter/Blur/Gaussian-Blur and adjust to blur around the 8 pixel radius. Then Image/Adjustments/invert to give a negative image. Final Select/All then Edit/Copy. We have now really finished with this layer either delete or de-select.

    With the lighter picture on the top add a layer mask to the lighter image. Hold Alt and click in the layer mask once. This brings layer mask to main screen. Edit/Paste the inverter black and white image into the layer. Click on main layer thumb nail to see the result.

    You may wish to increase contrast or other adjustments but that’s the basic instructions.

    Name:  10470159_10154625742920063_949611069956359480_o.jpg
Views: 341
Size:  151.0 KB

    I have used Facebook to host image hope it works OK. Before this I have used Apply and many other methods to auto combine. This method does seem the best. Photomatix is claimed to be best program. Picturenaut is very good. And CS5 Photoshop seems to also work well. But they all seem to flatten the image and local tone mapping is required to return the punch into the image.

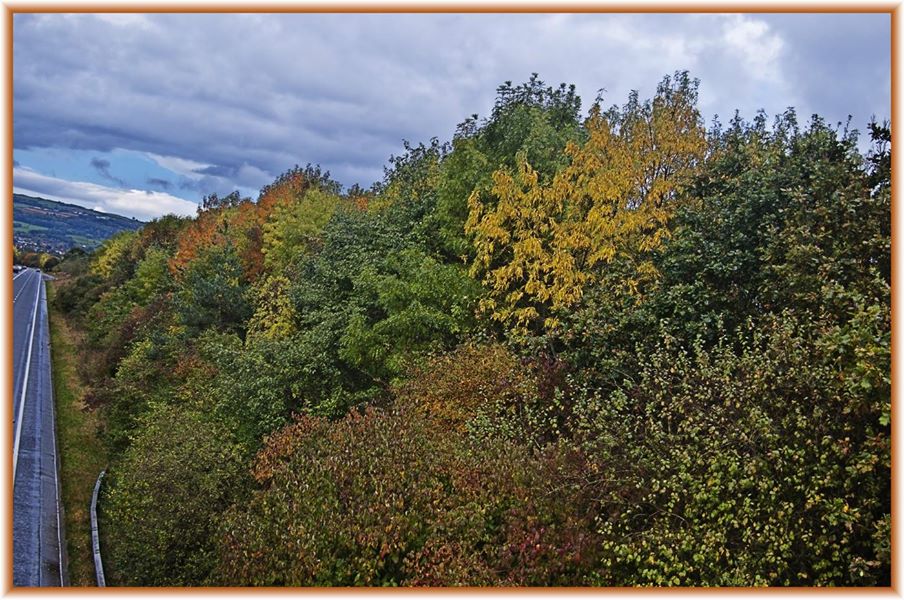
    As a result the layers and Mask seem to in general do a better job be it total manual or some automated method of producing the layer mask. In the picture shown the aim was to both show the Autumn colours (Fall colors to USA readers) and also show the clouds in the sky. The photos were taken in RAW with 2 EV between the images and by time they were converted to Jpeg more like 3 EV between images. Many methods including manual seem to show a line between the two images making it very obvious that some Photoshop methods have been used.

    My aim was to give the impression it was straight out of the camera even though it clearly was not. So comments please.

  2. #2
    Hawkeye17 is offline Junior Member
    Join Date
    Mar 2016
    Location
    Nelson BC
    Posts
    3
    My Photos
    Please do NOT edit my photos
    Critiques
    Critique my photos anywhere in the forum

    Default

    I think thats great and if I were walking the track I expect I would see that.

  3. #3
    ericmark is offline Senior Member
    Join Date
    Feb 2010
    Location
    North Wales. Near Chester and Wrexham
    Posts
    293
    My Photos
    Please feel free to edit my photos

    Default

    I also did a version with the road central and I won the local camera club competition for the beginners with the image. Unfortunately that week I was unable to attend so did not hear what the judge said. I have three versions of Photomatrix the essentials where free with mag subscription one is stand alone the other is as a add on to photoshop.

    I have become lazy and today I look at the pre-sets and simply select the best.

  4. #4
    John is offline Junior Member
    Join Date
    Jun 2017
    Location
    Midwest of USA
    Posts
    23
    My Photos
    Please do NOT edit my photos
    Critiques
    Critique my photos anywhere in the forum

    Default

    "HDR how do you cope with the extended range?"

    Shoot a single properly exposed ETTR RAW file, let the shadows fall where they may and normalize later in Photoshop.

    SOOC and after PP in Photoshop.
    Note: due posting limits and the use of a small sensor m4/3 camera these examples just give you a crude idea of what's possible. APS-C and FF, of course, would be better.

  5. #5
    Marko's Avatar
    Marko is offline Administrator
    Join Date
    May 2005
    Location
    Montreal, QC. Canada
    Posts
    14,870
    My Photos
    Please do NOT edit my photos
    Critiques
    Critique my photos anywhere in the forum

    Default

    Although your example is decent, this technique loses against real hdr (making multiple exposures of The same image at different exposures) 100% of the time.

    If you let the shadows fall where they may....you have noisy shadows - even in this example.

    When you use HDR to cover the shadows, and the highlights and the midtones, it only stands to reason that the file will always have more info...thus better.

    Royce Howland and I recorded a podcast that describes problems like noise and how to beat it. (with HDR )
    http://www.photography.ca/blog/2013/...ic-aberration/
    Hope that may help
    - Please connect with me further
    Photo tours of Montreal - Private photography courses
    - Join the new Photography.ca Facebook page
    - Follow me on Twitter http://twitter.com/markokulik
    - Follow me on Google+ https://plus.google.com/u/0/111159185852360398018/posts
    - Check out the photography podcast


    "You have to milk the cow quite a lot, and get plenty of milk to get a little cheese." Henri Cartier-Bresson from The Decisive Moment.

  6. #6
    ericmark is offline Senior Member
    Join Date
    Feb 2010
    Location
    North Wales. Near Chester and Wrexham
    Posts
    293
    My Photos
    Please feel free to edit my photos

    Default

    With the example you show with straight defined edges it is easy enough to blend two images, there is no need for a HDR program, in fact since also different focus two images blended together would kill two birds with one stone.

    The problem arises where there are no easy defined lines, there are a number of programs from Photoshop, to the specials like Picturenaut and Photomatrix which can be used to combine, however if you simply extend the range, then the photo becomes very wishy washy so we try to do two things, one extend the range, and two use local tone mapping to return the punch one needs. However in some cases this can produce halos around the edges.

    There are all sorts of tricks, including in 32 bit mode loading a black and white image into the mask, it can be time consuming, but also you can get some very good results. In the three years since starting the thread I have learnt many tricks, however the problem is they take time, so job one is to work out is it worth it? I have just been processing some woodland images, and tried a number of ideas including taking a sky from another image, however after trying, the best option was to simply crop away the sky.

  7. #7
    John is offline Junior Member
    Join Date
    Jun 2017
    Location
    Midwest of USA
    Posts
    23
    My Photos
    Please do NOT edit my photos
    Critiques
    Critique my photos anywhere in the forum

    Default

    "Although your example is decent, this technique loses against real hdr (making multiple exposures of The same image at different exposures) 100% of the time."

    Trust me I get all that but don't make the technically perfect the enemy of the good. Bracketed tripod mounted multiple shoots, at least for me and many others are, often, just not practical in the real world. The real world is often not that static and cooperative. I was just suggesting another and more practical technique for dealing with high dynamic range shots.

    Case in point. A quick and dirty snap shop of my very black cat in a extreme back lit situation. I had only seconds to frame, focus, adjust hgram and fire. Maybe not Ansel Adams perfect but more than good enough for my purposes and, I think, many others. There's more to a good image than just technique.

  8. #8
    Marko's Avatar
    Marko is offline Administrator
    Join Date
    May 2005
    Location
    Montreal, QC. Canada
    Posts
    14,870
    My Photos
    Please do NOT edit my photos
    Critiques
    Critique my photos anywhere in the forum

    Default

    I hear ya. Especially for cats and subjects that move. I'm a huge cat lover - what a beauty!

    But Ansel aside, the noise in this file (to my eye) is a distraction. You choose the perfect subject (backlit scene with a black cat) to illustrate the point.

    The cat's left side of its face, is full of noise... the 'corrected' exposure curve was pushed too far.

    I can see it here in the web version with my own eyes... (and once you see it...you cannot ignore it, so for me this is an 'Okay' file). It would be way more noticeable if you printed it old school at 4 x 6 inches. Personally i don't use HDR all that much - but when used, you are getting a significantly better image.

    Hope that may help - JMO
    - Please connect with me further
    Photo tours of Montreal - Private photography courses
    - Join the new Photography.ca Facebook page
    - Follow me on Twitter http://twitter.com/markokulik
    - Follow me on Google+ https://plus.google.com/u/0/111159185852360398018/posts
    - Check out the photography podcast


    "You have to milk the cow quite a lot, and get plenty of milk to get a little cheese." Henri Cartier-Bresson from The Decisive Moment.

Bookmarks

Posting Permissions

  • You may not post new threads
  • You may not post replies
  • You may not post attachments
  • You may not edit your posts
  •  

1 2 3 4 5 6 7 8 9 10 11 12 13 14 15 16 17 18 19 20 21 22 23 24 25 26 27 28 29 30 31 32 33 34 35 36