96 — Tripods for photography (the good stuff)

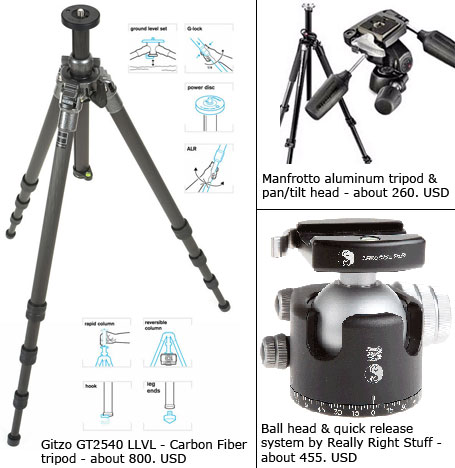
Pho­tog­ra­phy pod­cast #96 is a primer on how to buy a great tri­pod, what to look for in a tri­pod and why you should buy a great tri­pod. (In the lon­grun, if you stick with pho­tog­ra­phy long enough, you will be buy­ing a great tri­pod even­tu­ally anyway)

If you are seri­ous enough about your pho­tog­ra­phy that you save money to buy great lenses, then this pod­cast won’t scare the crap out of you.

If you are into the cheap stuff, and are more con­cerned about over­all price ver­sus over­all qual­ity, be afraid — be very afraid.

Tripods and heads for photography

Tripods and heads for photography

Links /resources men­tioned in this pod­cast:
Tri­pod arti­cle by Thom Hogan — a must read
Gitzo GT2540LLVL tri­pod at B&H
Man­frotto 055 Tri­pod plus 3-Way Pan/Tilt Head w/ Quick Release at B&H
The fol­low­ing com­pa­nies make rec­om­mended ball­heads — Arca Swiss — Acrat­echReally Right Stuff - MarkinsGitzoMan­frotto
Cheaper Car­bon fiber tripods by Induro — Benbo (Remem­ber to research and TRY spe­cific indi­vid­ual mod­els)
April’s reg­u­lar assign­ment on the Photography.ca forum — Geo­met­ric shapes
April’s level 2 assign­ment on the Photography.ca forum — Cre­ative underexposure


If you liked this pod­cast and want to review it on Itunes, this link gets you to the main page

If you are inter­ested in writ­ing for our blog please con­tact me photography.ca (   A   T  ) G m ail  Dot co m (using stan­dard email formatting)

Please join the Photography.ca fan page on Facebook

My Face­book pro­file — Feel free to “friend” me — please just men­tion Photography.ca
My Twit­ter page — I will fol­low you if you fol­low me — Let’s con­nect — PLEASE email me and tell me who you are in case I don’t rec­i­p­ro­cate because I think you are a spammer.

If you are still lurk­ing on our forum,
feel free to join our friendly :)  Pho­tog­ra­phy forum

Thanks to forum mem­ber Benny who posted a blog com­ment about our last pod­cast. Thanks as always to every­one that sent com­ments by email about our last pod­cast. Although ALL com­ments are appre­ci­ated, com­ment­ing directly in this blog is pre­ferred. Thanks as well to all the new mem­bers of the bul­letin board. Most of the links to actual the prod­ucts are affil­i­ate links that help sup­port this site. Thanks in advance if you pur­chase through those links.

If you are look­ing at this mate­r­ial on any other site except Photography.ca — Please hop on over to the Photography.ca blog and pod­cast and get this and other pho­tog­ra­phy info directly from the source. |Sub­scribe with iTunes |Sub­scribe via RSS feed |Sub­scribe with Google Reader|Sub­scribe for free to the Pho­tog­ra­phy pod­cast — Photography.ca and get all the posts/podcasts by Email
You can down­load this pho­tog­ra­phy pod­cast directly by click­ing the pre­ced­ing link or lis­ten to it almost imme­di­ately with the embed­ded player below.
Thanks for lis­ten­ing and keep on shooting!

Bokeh baby! by Kristen Smith

Aside from the razor-sharp sub­ject, one of the most impor­tant ele­ments of any close-up or macro pic­ture is bokeh. It is a funny con­cept that has many inter­pre­ta­tions and is def­i­nitely one of the more sub­jec­tive ele­ments of pho­tog­ra­phy. I’m not going to debate those, but I want to talk a lit­tle bit about how the delib­er­ate use of bokeh can help strengthen your images. Before I get going though, def­i­nitely lis­ten to this mini-podcast from Mar­tin Bai­ley on how to pro­nounce bokeh and its ety­mo­log­i­cal his­tory and cul­tural meaning.

In its sim­plest pho­to­graphic def­i­n­i­tion bokeh refers to the out of focus areas of a pic­ture. Mostly the mean­ing is applied to pho­tographs where there is a spe­cific sub­ject in the imme­di­ate fore­ground. Not always a close up or macro, but not really a land­scape either where some of the photo might not be in crisp focus. Bokeh is a prod­uct of shal­low depth of field which is achieved by a wide aper­ture rel­a­tive to the length of the lens.

One of the most dra­matic uses of bokeh is to sep­a­rate your sub­ject from the back­ground. Espe­cially if the back­ground is very busy. Ren­der­ing it smoothly out of focus makes things really pop –

Joyeuse by Kristen Smith

Joyeuse by Kris­ten Smith

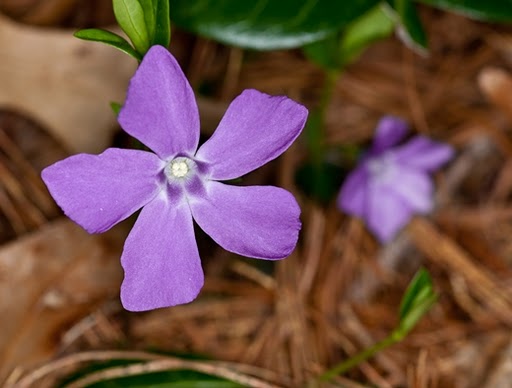
One of my favorite bokeh tech­niques is to echo the main sub­ject exactly. Your imag­i­na­tion can eas­ily fill in the miss­ing detail because it resem­bles the sharp sub­ject so much. The echo rein­forces the main idea, but also gives your brain some­thing to play with. The trick is to uti­lize an aper­ture that will simul­ta­ne­ously allow you to rec­og­nize the out of focus object and leave it fuzzy. I love this technique –

Vinca by Kristen Smith

Vinca by Kris­ten Smith

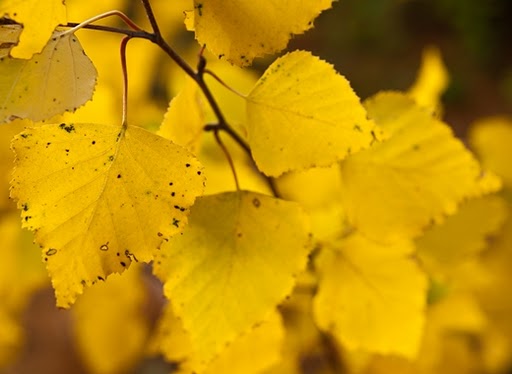
I also love how bokeh can cre­ate atmos­phere in a photo – mostly a gauzy, dreamy effect. It doesn’t work in all cir­cum­stances, but if you are work­ing in the right light it is beau­ti­ful. With this kind of image, the sub­ject most often is the bokeh itself with the sharply focused parts play­ing sup­port­ing roles only.

Birch by Kristen Smith

Birch by Kris­ten Smith

The dig­i­tal age is a real help when exper­i­ment­ing with bokeh because you can see your shot imme­di­ately and use live view and depth of field pre­view to fine-tune each one. Get to know your lens by shoot­ing objects at dif­fer­ent aper­tures and focal lengths then study­ing the effect. Think about what kind of photo you want to make and how bokeh can empha­size your photo’s intent.

Got any good bokeh shots? Feel free to add them in com­ments or join the Photography.ca forum and start a thread.

For more of Kristen’s out­door pho­tog­ra­phy and other arti­cles visit wickeddarkphotography.com

Photo Editing On The Cheap by Glenn Euloth

I love pho­tog­ra­phy and as much as I try to get the image right in cam­era when I press the shut­ter release there are just some times when you need adjust some over­ex­posed bits or pos­si­bly do some cus­tom edit­ing to cre­ate a minia­ture look or selec­tive colour­ing. What­ever the rea­son might be there will be times when you need to edit your images. A full out copy of Pho­to­shop is more than $500. Even Pho­to­shop Ele­ments clocks in at $100 or so which is not super expen­sive but still, if I have an extra $100 I’m putting it towards a new lens or maybe that new tri­pod that I need.

In my last blog for Photography.ca I wrote about Picasa. Picasa does a won­der­ful job of basic photo edit­ing, how­ever, it just doesn’t cut it for any­thing really detailed. When I need more detailed edit­ing capa­bil­i­ties I use Gimp. Gimp is a won­der­ful piece of soft­ware avail­able for free use for Win­dows and Mac users as well as the orig­i­nal Unix plat­form. A com­pan­ion prod­uct called ufRAW, also free, allows Gimp to open and edit RAW image files and since I shoot almost exclu­sively in RAW for­mat it was a nec­es­sary add-on.

Gimp will do a lot more than I am capa­ble of doing and I have still used it to do some amaz­ing things. Like Pho­to­shop it allows you to edit images using mul­ti­ple lay­ers, has many dif­fer­ent fil­ters and scripts that can change the look of your images (or parts of it) and also pro­vides many dif­fer­ent tools to work on your images. In this blog post I’ll edit an image and pro­vide some screen shots to give you an idea of the capa­bil­i­ties of this won­der­ful piece of soft­ware, how­ever, to really learn how to use it visit the tuto­ri­als page on the Gimp site.

In order to give you the broad­est tour pos­si­ble I will take an orig­i­nal image where I’ve done a fair bit of work on the image and walk you through the edit­ing steps that I took to get it the way I wanted. Some of you out there may be much bet­ter at photo edit­ing and so you will undoubt­edly see areas where I am doing some­thing wrong. Please feel free to com­ment below so I can learn more about how to do this stuff properly.

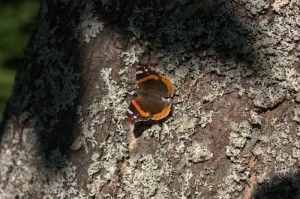
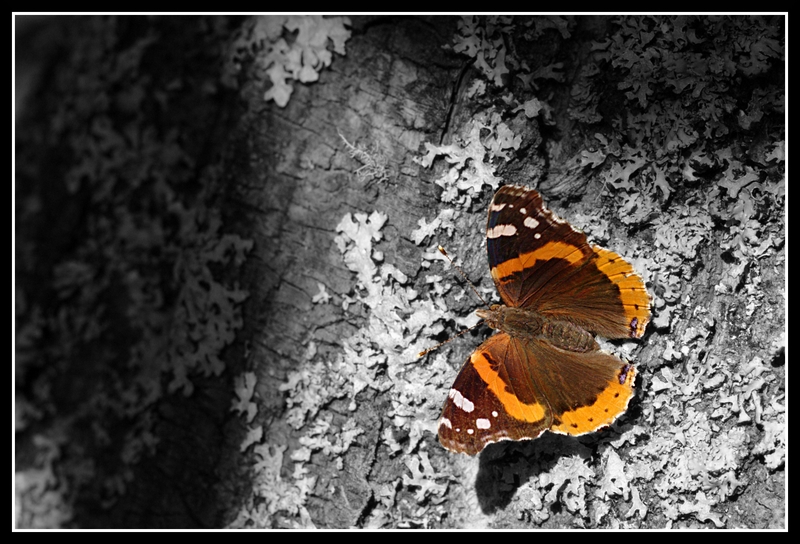
Let’s start with this pho­to­graph of a but­ter­fly. Here’s the JPEG ver­sion cre­ated by export­ing from Picasa with default set­tings. All things con­sid­ered it’s not a hor­ri­ble shot of the but­ter­fly but the com­po­si­tion is kind of blah and the butterfly’s cam­ou­flage makes it dif­fi­cult to see. Let’s open it in Gimp to see what we can do with this bor­ing image.

Butterfly on Tree

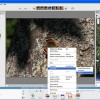
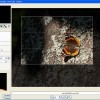
First up, since it’s a RAW and I have ufRAW installed it auto­mat­i­cally opens in ufRAW for me.  Here I can make adjust­ments to the RAW image before jump­ing into the Gimp edi­tor proper.  For this image I’m going to make a few adjust­ments here so I end up in Gimp with the basics already com­pleted.  This is the gen­eral process for me.

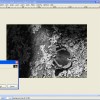
  1. From Picasa I right click and select Open in Gimp.
  2. It auto­mat­i­cally opens in ufRAW because it’s a RAW image.
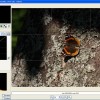
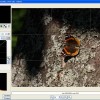
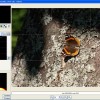
  3. I’ve clipped a few high­lights 0.1% and so I adjust the black lev­els a touch to elim­i­nate those.
  4. I then adjust the curves to boost the over­all expo­sure to where I like the image.
  5. Using the crop/rotate/size adjust tab I select a pleas­ing crop which puts the but­ter­fly on an inter­sec­tion of thirds and gives him space to “fly into”.  Note the grid lines allow me to do this easily.
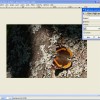
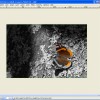
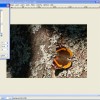
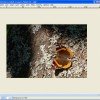
  6. Click­ing OK trans­fers the image into Gimp for fur­ther edit­ing where I adjust the colour lev­els and pump up the sat­u­ra­tion on this one to give that but­ter­fly a lit­tle more life.
  7. Next, I’m going to do some selec­tive colour­ing to really make him stand out.  So, I’ll dupli­cate the layer so I now have two butterflies.
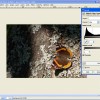
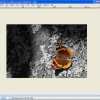
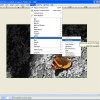
  8. Change the top layer to B&W and cre­ate a layer mask that I paint through to expose the butterfly.
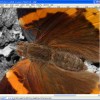
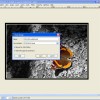
  9. I switched to the colour layer and added a touch of unsharp mask to sharpen up the image.
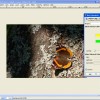
  10. Last, to fin­ish it off, I add a cou­ple of bor­ders, first white, then black and save as a JPEG.


6a 

6b  6c 

8a 

8b  8c 

9a  9b 

10a  10b

That’s it!  Here’s the result:

Butterfly Edited

Liv­ing in Hal­i­fax, Nova Sco­tia, Glenn Euloth enjoys trav­el­ling on the pho­to­graphic jour­ney.  Visit www.euloth.com to join him on the trip or find him on our pho­tog­ra­phy forum under the nick­name of Iguanasan.

95 — Larry King family portrait — Interview with Laszlo of Montreal

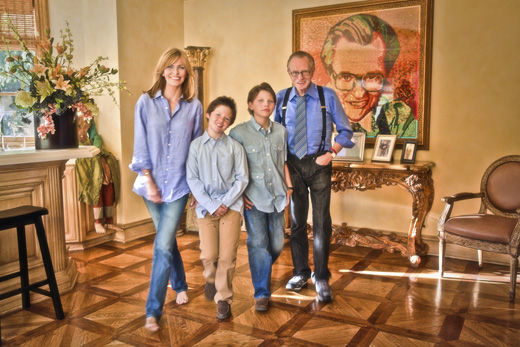
Pho­tog­ra­phy pod­cast #95 fea­tures an inter­view with Cana­dian pho­tog­ra­pher Las­zlo of Mon­treal. In this inter­view Las­zlo talks about a recent por­trait ses­sion with Larry King and his fam­ily. In an effort to illus­trate how keep­ing it sim­ple can yield great results, Las­zlo decon­structs this pho­to­graph while talk­ing about light­ing, com­po­si­tion and technique.

Larry King family portrait by Laszlo of Montreal

Larry King fam­ily © Las­zlo of Montreal

Links /resources men­tioned in this podcast:

Show us your parks is the reg­u­lar assign­ment this month on our pho­tog­ra­phy forum
Macro — closeup  is the level 2 assign­ment this month on our pho­tog­ra­phy forum
If you liked this pod­cast and want to write a tes­ti­mo­nial, it’s a great way to say “Thanks” and it’s super-appreciated

If you liked this pod­cast and want to review it on Itunes, this link gets you to the main page

If you are inter­ested in writ­ing for our blog please con­tact me photography.ca (   A   T  ) G m ail  Dot co m (using stan­dard email formatting)

Please join the Photography.ca fan page on Facebook

My Face­book pro­file — Feel free to “friend” me — please just men­tion Photography.ca
My Twit­ter page — I will fol­low you if you fol­low me — Let’s con­nect — PLEASE email me and tell me who you are in case I don’t rec­i­p­ro­cate because I think you are a spammer.

If you are still lurk­ing on our forum,
feel free to join our friendly :)  Pho­tog­ra­phy forum

Thanks to forum mem­ber Glenn Euloth (AKA Igua­nasan on our forum) who posted a blog com­ment about our last pod­cast. Thanks as always to every­one that sent com­ments by email about our last pod­cast. Although ALL com­ments are appre­ci­ated, com­ment­ing directly in this blog is pre­ferred. Thanks as well to all the new mem­bers of the bul­letin board. Most of the links to actual the prod­ucts are affil­i­ate links that help sup­port this site. Thanks in advance if you pur­chase through those links.

If you are look­ing at this mate­r­ial on any other site except Photography.ca — Please hop on over to the Photography.ca blog and pod­cast and get this and other pho­tog­ra­phy info directly from the source. |Sub­scribe with iTunes |Sub­scribe via RSS feed |Sub­scribe with Google Reader|Sub­scribe for free to the Pho­tog­ra­phy pod­cast — Photography.ca and get all the posts/podcasts by Email
You can down­load this pho­tog­ra­phy pod­cast directly by click­ing the pre­ced­ing link or lis­ten to it almost imme­di­ately with the embed­ded player below.

Thanks for lis­ten­ing and keep on shooting!

Graven Images – Ideas for Cemetery Photography by Kristen Smith

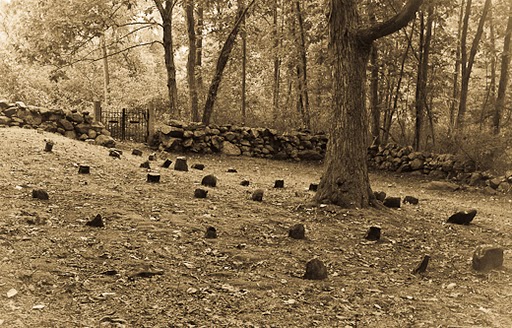
Strange as it may seem to some, I find ceme­ter­ies peace­ful places and I enjoy spend­ing time in them.  I also enjoy pho­tograph­ing them.  I’m mostly fas­ci­nated by the over­all aes­thetic of a ceme­tery, how the stones are placed, the ways they’ve shifted and changed over time, the carv­ings and motifs through the decades, dec­o­ra­tive arrange­ments like walls and gates; it all fas­ci­nates me and I do my best to cap­ture the essence of a grave­yard when­ever I shoot one.

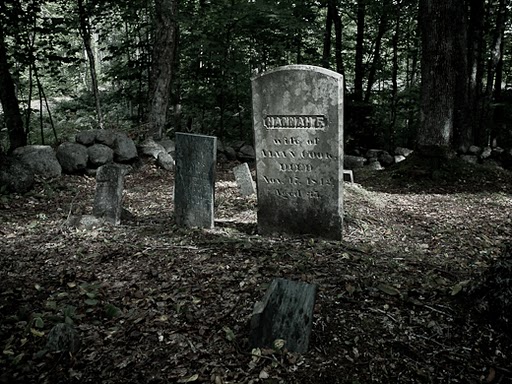
Haunting the Obscure by Kristen Smith

Haunt­ing the Obscure by Kris­ten Smith

There are some gen­eral guide­lines you should fol­low when shoot­ing bur­ial grounds.  The first thing to remem­ber is to be respect­ful.  These places rep­re­sent lives and his­tory and often sor­row.  If there are mourn­ers or vis­i­tors present, give them space.  Don’t crash a ceremony.

Also don’t touch or move any­thing with respect to the graves them­selves.  If one is dam­aged or fallen over, leave it.  Some­times branches or other debris fall on mon­u­ments and I always leave those as well, unless it is pho­to­graph­i­cally in the way.  I also avoid climb­ing over any­thing I don’t have to like walls or gates. And I never remove any­thing from a gravesite and I can’t imag­ine doing so.

Angle of Repose by Kristen Smith

Angle of Repose by Kris­ten Smith

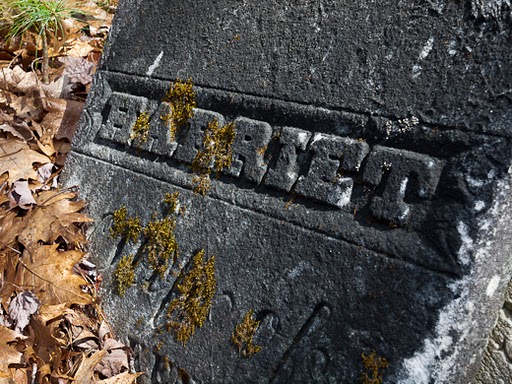
My main inter­est is in old ceme­ter­ies.  Luck­ily in New Eng­land we have the old­est Euro­pean ceme­ter­ies in the coun­try and I’m never short of sub­jects.  What­ever your par­tic­u­lar inter­est is, find ways to accen­tu­ate what you find inter­est­ing.  It might be par­tic­u­larly mov­ing epi­taphs, or art­work and com­mon dec­o­ra­tive motifs or maybe just find­ing stones of peo­ple with your name.  Per­son­ally I like to show the over­all struc­ture and char­ac­ter of a ceme­tery as well as high­light some of the old­est or most inter­est­ing head­stones.  Decay­ing stones are always ter­rific sub­jects; lichen, cracks, weath­er­ing and even out­right destruc­tion can make for really inter­est­ing images.

Harriet Obscured by Kristen Smith

Har­riet Obscured by Kris­ten Smith

I will admit that after years of shoot­ing in ceme­ter­ies it does get tougher to come up with orig­i­nal com­po­si­tions.  Some­times approach­ing a grave yard in a dif­fer­ent sea­son helps, like win­ter.  Some­times it means get­ting there at a cer­tain time of day so that carv­ings are brought up strongly with shad­ows. Some­times it means find­ing unusual per­spec­tives and includ­ing other things like walls and gates in my com­po­si­tions.  Fre­quently I use dif­fer­ent post-processing tech­niques to bring out what I want in a photo.  This doesn’t always mean black and white or sepia, but I do use them since they espe­cially suit the older bur­ial grounds I haunt.

Keeping Watch by Kristen Smith

Keep­ing Watch by Kris­ten Smith

So don’t be afraid to step into that ceme­tery near your house.  Explore it respect­fully, pho­to­graph it cre­atively and walk away with a sense of history.

Kris­ten Smith is a New Eng­land pho­tog­ra­pher whose ceme­tery work can be found in her Graven Images Gallery

94 — Turning day into night

Pho­tog­ra­phy pod­cast #94 teaches how to turn day into night or late after­noon for por­trait pur­poses. This tech­nique is often used by wed­ding, fash­ion and por­trait pho­tog­ra­phers. The goal of the tech­nique is to make the sky look darker so that the model pops against the sky. This often adds mood and/or drama to a shot. We dis­cuss 2 tech­niques; using flash and cam­era in man­ual non TTL (Through the lens) mode as well as TTL mode. We also touch on flash sync speeds.

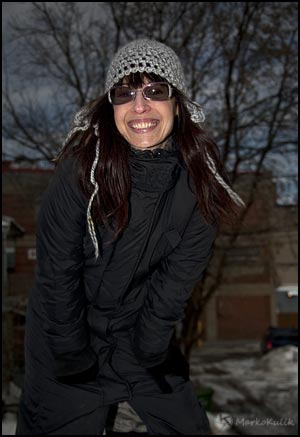
This image looks like it was shot in the late after­noon but it was shot at 1pm. Cam­era mode was aper­ture pri­or­ity using TTL flash. Expo­sure com­pen­sa­tion was set to –3 on cam­era and +2 for the direct on cam­era flash. I would have taken the flash off cam­era for a bet­ter light­ing pat­tern but it was minus 15 C and my model only had 5 min­utes in her.

Links /resources men­tioned in this podcast:

Show us your parks is the reg­u­lar assign­ment this month on our pho­tog­ra­phy forum
Macro — closeup  is the level 2 assign­ment this month on our pho­tog­ra­phy forum
If you are inter­ested in writ­ing for our blog please con­tact me photography.ca (   A   T  ) G m ail  Dot co m (using stan­dard email formatting)

Please join the Photography.ca fan page on Facebook

If you liked this pod­cast and want to review it on Itunes, this link gets you to the main page

My Face­book pro­file — Feel free to “friend” me — please just men­tion Photography.ca
My Twit­ter page — I will fol­low you if you fol­low me — Let’s con­nect — PLEASE email me and tell me who you are in case I don’t rec­i­p­ro­cate because I think you are a spammer.

If you are still lurk­ing on our forum,
feel free to join our friendly :)  Pho­tog­ra­phy forum

Thanks to kat, Wicked Dark and Shant M who posted a blog com­ment about our last pod­cast. Thanks as always to every­one that sent com­ments by email about our last pod­cast. Although ALL com­ments are appre­ci­ated, com­ment­ing directly in this blog is pre­ferred. Thanks as well to all the new mem­bers of the bul­letin board. Most of the links to actual the prod­ucts are affil­i­ate links that help sup­port this site. Thanks in advance if you pur­chase through those links.

If you are look­ing at this mate­r­ial on any other site except Photography.ca — Please hop on over to the Photography.ca blog and pod­cast and get this and other pho­tog­ra­phy info directly from the source. |Sub­scribe with iTunes |Sub­scribe via RSS feed |Sub­scribe with Google Reader|Sub­scribe for free to the Pho­tog­ra­phy pod­cast — Photography.ca and get all the posts/podcasts by Email
You can down­load this pho­tog­ra­phy pod­cast directly by click­ing the pre­ced­ing link or lis­ten to it almost imme­di­ately with the embed­ded player below.

Thanks for lis­ten­ing and keep on shooting!

Managing Photos with Picasa by Glenn Euloth

I am a geek and I have been a geek for a long time. ‚So, when I first started man­ag­ing my dig­i­tal images I never thought I could trust a piece of soft­ware to look after the files on my com­puter. ‚I would use Win­dows Explorer to copy the files off of my cam­era and into a folder on my hard drive. ‚If I wanted to edit an image I would make a copy first and then edit the copy. ‚It worked great but it was very time consuming.

I tried the Kodak soft­ware that came with my first point and shoot but it was very slow and clunky and didn‚„t come with a decent image edi­tor so I gave up on it and went back to copy­ing files in Windows.

Google bought Picasa from Ide­alab in 2004, branded it, and started giv­ing it away as a free down­load. ‚The Google fan-boy that I am I decided to give it a try and it was instant soft­ware love. ‚I don‚„t know how much of it was Ide­alab and how much of it was Google but I found Picasa to be a won­der­ful piece of soft­ware that did every­thing I needed in a slick, easy to use package.

First up was image import. ‚I no longer had to launch two explorer win­dows, cre­ate a folder and copy the files from my SD card to the new folder. ‚Instead, insert­ing the SD card into my lap­top auto­mat­i­cally launches a win­dow that asks me if I want to import the files into Picasa. ‚All I have to do is click OK. ‚Picasa looks after the copy process and deletes all the images off the SD card after con­firm­ing the copy so I‚„m ready to go shoot­ing again.

Next is the easy edit­ing tools. ‚Once the image is in Picasa I can quickly nav­i­gate to an image and per­form a num­ber of easy edits.

Picasa soft­ware — Click to enlarge

  1. Red-eye removal
  2. Sat­u­ra­tion and sharpening
  3. Con­vert to black and white or sepia
  4. Crop to any dimen­sion or aspect ratio
  5. Facial recog­ni­tion
  6. Straighten the image
  7. Tag and Geotag
  8. And much, much more…

Not only do the edit tools work eas­ily and quickly but Picasa auto­mat­i­cally cre­ates a backup copy of the image and per­forms the edits on the copy so if you make a mis­take or if you want a copy of the orig­i­nal you can always find it or revert back.

I ran into a bit of prob­lem orga­niz­ing my images ini­tially as I was not using Picasa so I had cre­ated a 2009 folder and in it I cre­ated Jan­u­ary, Feb­ru­ary, March, etc. ‚After I started using Picasa I had a very sim­ple way to upload images to Pica­s­aWeb for shar­ing with just a click of a but­ton, how­ever, it used the folder name as the album name on Pica­s­aWeb. ‚This became a prob­lem when I started upload­ing ‚“Jan­u­ary‚ images from 2010 as they got put in the same album on PicasaWeb.

To solve this prob­lem I devel­oped the fol­low­ing strat­egy: ‚At the begin­ning of the month I cre­ate a folder in Picasa with the for­mat YYYY-MM (Mon­th­name), so for exam­ple I have 2011-01 (Jan­u­ary), 2011-02 (Feb­ru­ary), etc. ‚This allows me to store and man­age the images by date with­out wor­ry­ing about dupli­cates and when I want my hol­i­day pho­tos I can eas­ily search for ‚“December‚.

If you are not sure how to man­age your pho­tos or if the soft­ware you are using is awk­ward and not work­ing well for you then I highly rec­om­mend you‚down­load and install it. ‚At the very least you should check out the‚video. ‚Come back next month and I‚„ll talk about advanced image edit­ing with­out hav­ing to spend a lot of money on expen­sive software.

Liv­ing in Hal­i­fax, Nova Sco­tia, Glenn Euloth enjoys trav­el­ling on the pho­to­graphic jour­ney. ‚Visit‚www.euloth.com to join him on the trip or find him on our pho­tog­ra­phy forum under the nick­name of Iguanasan.

Three Basic Rules of Close-Up Photography by Kristen Smith

So you want to get close, huh? ‚Close-up pho­tog­ra­phy is mag­i­cal and can be done with almost any lens, even your nor­mal zoom lens (all of these shots were taken with the Zuiko Dig­i­tal 12-60mm zoom, not a macro lens). ‚Sure, seri­ous macro pho­tog­ra­phy requires spe­cial­ized equip­ment, but you can get good results right away using what you have if you remem­ber a few guidelines.

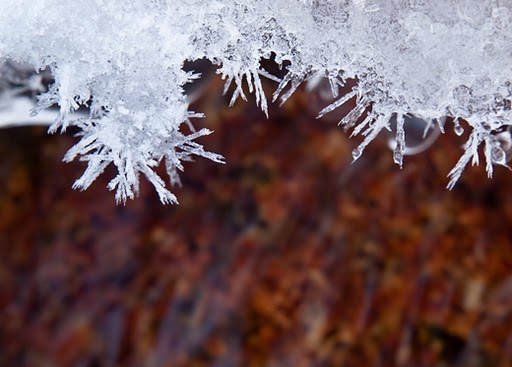
First ‚œ get close! ‚So many times I see ‚Ëœclose-up‚„ pic­tures that include way too much in the frame. ‚Like a flower image that shows other flow­ers, leaves, a fence, the dirt etc. ‚That‚„s not a close-up. ‚The rea­son good close-up and macro pho­tos are so mag­i­cal is that they show us a world we might not ordi­nar­ily notice. ‚Here‚„s what to do, find out how close your lens will focus and then try and stick to that as much as pos­si­ble. ‚My ZD 12-60mm lets me get a cou­ple inches from my sub­ject and does a good enough job that I can some­times leave my macro lens at home.


Ice Crys­tals by Kris­ten Smith

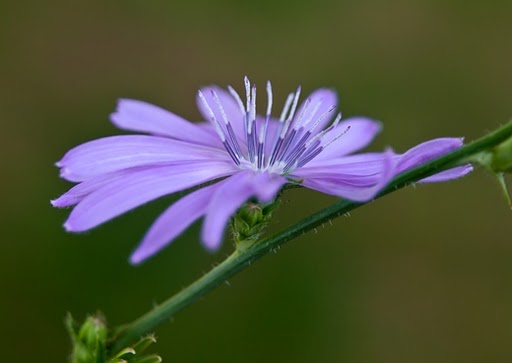
Sec­ond ‚œ iso­late! ‚Close-up pho­tographs are much more effec­tive when the sub­ject is clearly sep­a­rated from the rest of the scene. ‚You can do this in two ways, first by choos­ing a sub­ject that doesn‚„t have any­thing near enough to be in the frame with it. ‚So pick that flower or mush­room that doesn‚„t have any friends. The sec­ond way you can iso­late your sub­ject is by open­ing your lens to a large aper­ture. ‚Doing this lim­its your depth of field and cre­ates an out of focus back­ground also known as bokeh. ‚Of course sharp focus on your main sub­ject is crit­i­cal, so be care­ful. ‚Watch the shut­ter speeds and use a tri­pod if necessary.

Chicory Blos­som by Kris­ten Smith

Third ‚œ sur­prise! ‚Show me some­thing dif­fer­ent. ‚Oh gee, another flower pic­ture. ‚Yay. ‚How about a bug? ‚Yawn. ‚A leaf? ‚Zzzzz. ‚Sorry, I‚„m not really dump­ing on any of these things, but haven‚„t we all seen a mil­lion of them? ‚I‚„m just as guilty of it. ‚After a while they‚„re all the same and it takes an effort to bring some­thing dif­fer­ent to the world of close-up pho­tog­ra­phy. ‚Find it. ‚What­ever it takes, find some­thing unusual about an every­day object or some­thing you hardly ever see pho­tographed. ‚Try new angles, per­spec­tives, jux­ta­po­si­tions, play with depth of field, back­ground, color com­bi­na­tions; any­thing to help your image break free of sameness.

Bro­ken Cork by Kris­ten Smith

So that should get you started. ‚Get close, iso­late and sur­prise me! ‚Feel free to post com­ments with links to your best close-up pho­tos or share them on the‚forum.

My Web­site = www.wickeddarkphotography.com and I’m based in New Hamp­shire, USA

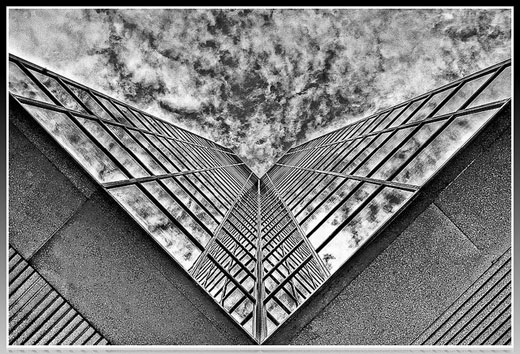
Photographing Architectural Abstracts by Lisa Couldwell

Liv­ing in the down­town core of a large city with some inter­est­ing glass tow­ers makes for great oppor­tu­ni­ties to shoot urban archi­tec­tural abstracts. The beauty of this type of pho­tog­ra­phy is that some­times unco­op­er­a­tive weather or light can make for some great oppor­tu­ni­ties to catch build­ing reflec­tions. So any day I feel the need to get out for a walk, I take my cam­era and head down­town to see what the tow­ers will offer up for opportunities.

I guess the most impor­tant aspect of shoot­ing these types of sub­jects is the abil­ity to look up, ver­ti­cal, side­ways, basi­cally any way that gives one a dif­fer­ent per­spec­tive. When shoot­ing, look for inter­est­ing shapes and reflec­tions off the glass win­dows of the tow­ers. This can be any­thing from the reflec­tions of the other parts of the build­ings them­selves, to reflec­tions of the sky or clouds, sun­light or other build­ings in the area.

Energy Plaza - Calgary, Alberta by Lisa Couldwell

Energy Plaza — Cal­gary, Alberta by Lisa Couldwell

If you see some­thing that catches your eye, try turn­ing your head, body in a way that might per­haps give you a dif­fer­ent per­spec­tive and if you see some­thing, get the cam­era ready. I usu­ally set my Pen­tax into auto-bracket mode because I like to have the option of an HDR shot to play around with when I get home. Put the cam­era to the eye and again turn the cam­era, side­ways, on an angle or basi­cally any way that inten­si­fies the abstract­ness of what you see through the lens. Take your time and don’t be afraid to take sev­eral ver­sions of the shot while mov­ing the cam­era and your body into dif­fer­ent angles as you never know what may work and what may not. When com­pos­ing the image in cam­era, I often com­pose lines to move on the diag­o­nal as this moves the eye through the photo and cre­ates a pleas­ing per­spec­tive. I look for sym­met­ri­cal and geo­met­ric shapes when I move and pho­to­graph. I will go across the street and try from a dif­fer­ent street cor­ner as well. The beauty of this kind of pho­tog­ra­phy is any­thing goes and you never know what you may end up with just by mov­ing either a few cen­time­ters or sev­eral feet. (Just as an FYI, some­times you may get has­sled from secu­rity peo­ple but in Canada as long as you are on a pub­lic side­walk and not on pri­vate prop­erty you have the right to con­tinue to photograph.)

In this image, I really was attracted to the V shaped angle of the build­ing, van­ish­ing per­spec­tive, sym­me­try, and the reflec­tions of the other win­dows and the clouds. I pointed the cam­era straight up and tried to angle it so it was per­fectly sym­met­ri­cal. I then auto­brack­eted 3 shots at expo­sures of +.5/0/-.5 stops, com­bined them into an HDR image in Pho­tomatix, con­verted to BW in Sil­ver Efex and minor touch ups in Light­room to really bring out the cloud detail.

Lisa Could­well is a pho­tog­ra­pher liv­ing in Cal­gary Alberta, Canada. You can check out more of her work in the Pen­tax Gallery, on flu­idr,‚and on Smug­mug. She also goes by the han­dle casil403 on our pho­tog­ra­phy forum.

93 — Black and white photography — qualities that make good bw images

Pho­tog­ra­phy pod­cast #93 is based on a thread in our pho­tog­ra­phy forum by mem­ber asnow where he asks about the qual­i­ties make a good black and white photo. A num­ber of other forum mem­bers help answer the ques­tion and I offer up some per­sonal opin­ions as well. One‚piece‚of good advice involves learn­ing to see in black and white using a dig­i­tal cam­era. Most dig­i­tal cam­eras can cap­ture the image in colour but SHOW it to you on your camera’s screen in black and white. This allows you to learn how coloured tones under a given light look in black and white. (Look up the word mono­chrome in your camera’s instruc­tion man­ual for instruc­tions on how to do this). Live view is also fan­tas­tic as it shows you how the scene will look in BW even before you click the shut­ter. (Many thanks to asnow, raven4ns, Wicked Dark and Andrew for their con­tri­bu­tions to the thread and podcast.)

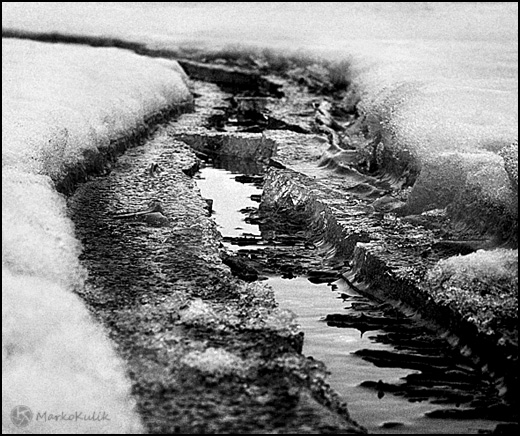
Snow Tracks - Marko Kulik

Snow Tracks — Marko Kulik

Links /resources men­tioned in this podcast:

The Zone Sys­tem — Wikipedia | The Zone sys­tem on Lumin­ious land­scape
Wicked Dark’s arti­cle Black and White 101

Emo­tion is the reg­u­lar assign­ment this month on our pho­tog­ra­phy forum

Back­light­ing is the level 2 assign­ment this month on our pho­tog­ra­phy forum
If you are inter­ested in writ­ing for our blog please con­tact me photography.ca ( ‚ A ‚ T ‚) G m ail ‚Dot co m (using stan­dard email formatting)

Please join the Photography.ca fan page on Facebook

If you liked this pod­cast and want to review it on Itunes, this link gets you to the main page

My Face­book pro­file — Feel free to “friend” me — please just men­tion Photography.ca
My Twit­ter page — I will fol­low you if you fol­low me — Let’s con­nect — PLEASE email me and tell me who you are in case I don’t rec­i­p­ro­cate because I think you are a spammer.

If you are still lurk­ing on our forum,
feel free to join our friendly :)Pho­tog­ra­phy forum

Thanks to kawarthabob, and kat‚who posted a blog com­ment about our last pod­cast. Thanks as always to every­one that sent com­ments by email about our last pod­cast. Although ALL com­ments are appre­ci­ated, com­ment­ing directly in this blog is pre­ferred. Thanks as well to all the new mem­bers of the bul­letin board. Most of the links to actual the prod­ucts are affil­i­ate links that help sup­port this site. Thanks in advance if you pur­chase through those links.

If you are look­ing at this mate­r­ial on any other site except Photography.ca — Please hop on over to the‚Photography.ca blog and pod­cast and get this and other pho­tog­ra­phy info directly from the source. |Sub­scribe with iTunes |Sub­scribe via RSS feed |Sub­scribe with Google Reader |Sub­scribe for free to the Pho­tog­ra­phy pod­cast — Photography.ca and get all the posts/podcasts by Email
You can down­load this pho­tog­ra­phy pod­cast directly by click­ing the pre­ced­ing link or lis­ten to it almost imme­di­ately with the embed­ded player below.

Thanks for lis­ten­ing and keep on shooting!

92 — My damn lenses keep vignetting — solving vignetting problems

Pho­tog­ra­phy pod­cast #92 talks about solv­ing vignetting which is the unwanted dark­en­ing around the edges or cor­ners in your pho­tographs. We talk about 2–3 very com­mon rea­sons why even pro­fes­sional lenses that cost a for­tune, STILL suf­fer from vignetting in cer­tain cases. ‚We also talk about why many peo­ple never notice the vignetting in their pho­tographs even though it’s often there.

Mechanical or filter vignetting

This is mechan­i­cal vignetting of a shot of the sky on my F2.8 24mm wide angle lens and is due to too many fil­ters in front of the lens. Shot at left at F2.8. Stop­ping down to F 5.6 (right shot) ‚helps slightly. A bet­ter solu­tion here is to sim­ply use less fil­ters, or wider ones.

Optical vignetting

Opti­cal vignetting on neu­tral sub­ject. Shot at left is at F-5.6 focused on infin­ity using the 300mm end of my 28–300 zoom. Shot at right is at F-11 focused on infin­ity using the 300mm end of my 28–300 zoom‚and the vignetting is almost gone. Both images shot with­out fil­ters of any kind. This type of vignetting can occur in some cases on almost any DSLR lens regard­less of price.‚Listening‚to the pod­cast explains why this happens.

Links /resources men­tioned in this podcast:

Cam­bridge in Colour arti­cle on lenses
Wider Cokin Z fil­ter hold­ers at B&H
Step up rings at B&H
Adapter rings at B&H
Emo­tion is the reg­u­lar assign­ment this month on our pho­tog­ra­phy forum
Back­light­ing is the level 2 assign­ment this month on our pho­tog­ra­phy forum

Please join the Photography.ca fan page on Facebook

If you liked this pod­cast and want to review it on Itunes, this link gets you to the main page

My Face­book pro­file — Feel free to “friend” me — please just men­tion Photography.ca
My Twit­ter page — I will fol­low you if you fol­low me — Let’s con­nect — PLEASE email me and tell me who you are in case I don’t rec­i­p­ro­cate because I think you are a spammer.

If you are still lurk­ing on our forum,
feel free to join our friendly :)Pho­tog­ra­phy forum

Thanks to Jack Label and Sevenwords‚who posted a blog com­ment about our last pod­cast. Thanks as always to every­one that sent com­ments by email about our last pod­cast. Although ALL com­ments are appre­ci­ated, com­ment­ing directly in this blog is pre­ferred. Thanks as well to all the new mem­bers of the bul­letin board. Most of the links to actual the prod­ucts are affil­i­ate links that help sup­port this site. Thanks in advance if you pur­chase through those links.

If you are look­ing at this mate­r­ial on any other site except Photography.ca — Please hop on over to the‚Photography.ca blog and pod­cast and get this and other pho­tog­ra­phy info directly from the source. |Sub­scribe with iTunes |Sub­scribe via RSS feed |Sub­scribe with Google Reader |Sub­scribe for free to the Pho­tog­ra­phy pod­cast — Photography.ca and get all the posts/podcasts by Email
You can down­load this pho­tog­ra­phy pod­cast directly by click­ing the pre­ced­ing link or lis­ten to it almost imme­di­ately with the embed­ded player below.

Happy New Year every­one and only the best for 2011 — thanks for lis­ten­ing and keep on shooting!

91 — 3 ways to reduce noise in photography

Pho­tog­ra­phy pod­cast #91 dis­cusses 3 common‚reasons‚we get noise in our pho­tographs and we offer tips on how to beat that noise. For the pur­poses of this pod­cast, noise is the appear­ance of coloured‚specks, ‚monochromatic‚specks or bands/lines that appear in your pho­tographs (often in uni­form areas like the sky or in the shad­owy parts of the image) that should not be there.

Scene from Oka Parc Quebec Canada

Scene from Oka Park Que­bec Canada

This image from OKA Park looks pleas­ing enough and look­ing at it here you might not know that the image was under­ex­posed. I boosted the lev­els in Pho­to­shop so at first glance it looks pretty good.

HOWEVER, this 100% crop from the same image reveals the noise (colours in the snow) due to underexposure.

Snow detail crop at 100% shows colour noise

Snow detail crop at 100% shows colour noise

TIP — Don’t auto­mat­i­cally under­ex­pose. Under­ex­pose the scene only when necessary.

Links /resources men­tioned in this podcast:

Cam­bridge in Colour arti­cle on noise
Noise Ninja
Dfine
Topaz Denoise

Shiny‚is the reg­u­lar assign­ment this month on our pho­tog­ra­phy forum
Ton sur Ton is the level 2 assign­ment this month on our pho­tog­ra­phy forum

Please join the Photography.ca fan page on Facebook

If you liked this pod­cast and want to review it on Itunes, this link gets you to the main page

My Face­book pro­file — Feel free to “friend” me — please just men­tion Photography.ca
My Twit­ter page — I will fol­low you if you fol­low me — Let’s con­nect — PLEASE email me and tell me who you are in case I don’t rec­i­p­ro­cate because I think you are a spammer.

If you are still lurk­ing on our forum,
feel free to join our friendly :) Pho­tog­ra­phy forum

Thanks to rabs, Lee Sacrey, Las Vegas Wed­dings, Charles binns land­scape pho­tog­ra­phy, and Michael Van der Tol who posted a blog com­ment about our last pod­cast. Thanks as always to every­one that sent com­ments by email about our last pod­cast. Although ALL com­ments are appre­ci­ated, com­ment­ing directly in this blog is pre­ferred. Thanks as well to all the new mem­bers of the bul­letin board. Most of the links to actual the prod­ucts are affil­i­ate links that help sup­port this site. Thanks in advance if you pur­chase through those links.

If you are look­ing at this mate­r­ial on any other site except Photography.ca — Please hop on over to the‚Photography.ca blog and pod­cast and get this and other pho­tog­ra­phy info directly from the source. |Sub­scribe with iTunes |Sub­scribe via RSS feed |Sub­scribe with Google Reader |Sub­scribe for free to the Pho­tog­ra­phy pod­cast — Photography.ca and get all the posts/podcasts by Email
You can down­load this pho­tog­ra­phy pod­cast directly by click­ing the pre­ced­ing link or lis­ten to it almost imme­di­ately with the embed­ded player below.

Happy Hol­i­days every­one and only the best for 2011 — thanks for lis­ten­ing and keep on shooting!