 LinkBack URL
 About LinkBacks
I tried it out after a short tutorial and was already pleased with it.Originally Posted by theantiquetiger

A little more work on my shots and I should see a vast improvement.

This is a discussion on Type of lighting for kitchen photos within the Lighting forums, part of the Education & Technical category; Originally Posted by theantiquetiger You have to understand what HDR is. It is usually a combination of three of the ...
 Junior Member
I tried it out after a short tutorial and was already pleased with it.
A little more work on my shots and I should see a vast improvement.
Moderator
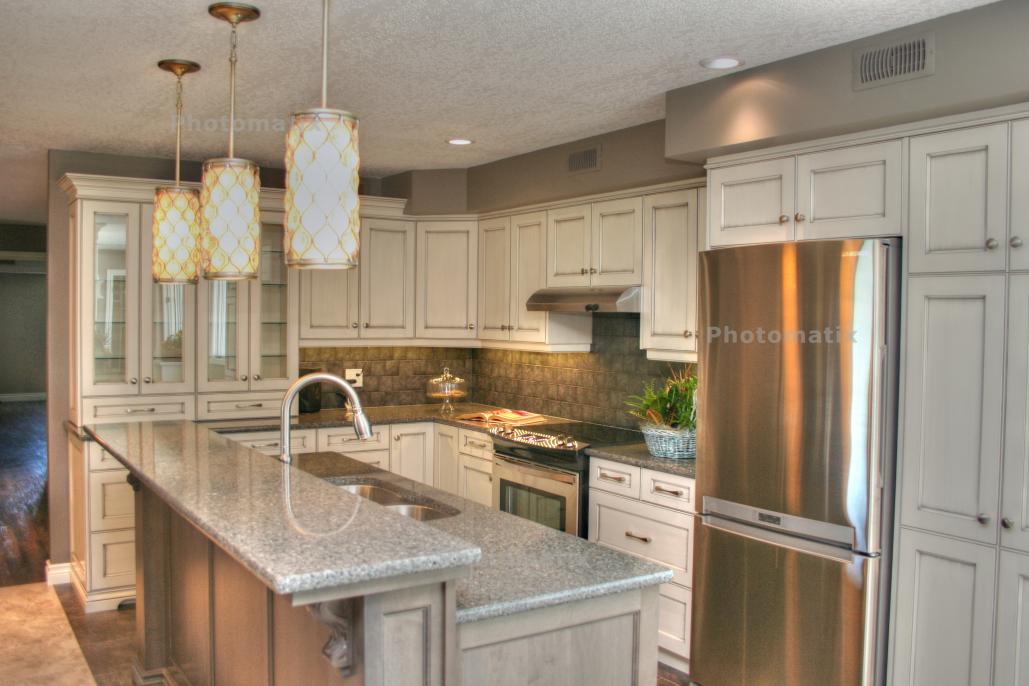
Your HDR above came out amazing!!!! That looks like a kitchen from a magazine.
Another free software is GIMP. It is a simple photoshop software and pretty easy to learn.
A couple things in photography you will want to learn is basic composition, rules of thirds, leading lines, etc. There are a few blogs and podcast on these subjects here on this forum and these simple basics will improve your images 1000 fold. Your image above is actually a good shot that follows some of these basic rules.
Image a tic tac toe board laying on top of you image, dividing your image in thirds horizontally and vertically. The four corners that are formed by the two horizontal and vertical lines are the places where you want the main interest to fall (or nearly fall) in your image. The above image has this, the hanging lights fall on the upper left corner. The fridge follows the horizontal line (another good thing). Make sure your image is level. The leaning of the fridge is hurting the image. If you cannot shoot it level, you can level it in GIMP.
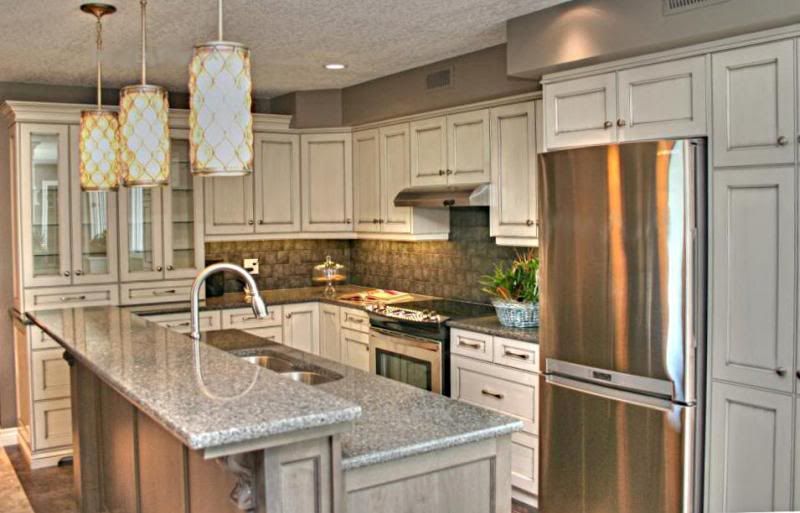
I leveled it for you and rid some of the dead space above the fridge and left of the last cabinet (since I leveled the fridge, it threw the left cabinet out of level, so its really each their own, or split the difference)
One more thing, use the stuff on the countertops (cake plate, etc) to hide the outlets. The outlet is dead in the middle of the image, just above the faucet. It is hurting the image, it is trying to draw your eye into it because it is white.
Last edited by theantiquetiger; 06-21-2013 at 06:15 PM.
"The worst thing about taking a great image is that your next one has to be better!"
Junior Member
[QUOTE=theantiquetiger;143914]Your HDR above came out amazing!!!! That looks like a kitchen from a magazine.
Another free software is GIMP. It is a simple photoshop software and pretty easy to learn.
A couple things in photography you will want to learn is basic composition, rules of thirds, leading lines, etc. There are a few blogs and podcast on these subjects here on this forum and these simple basics will improve your images 1000 fold. Your image above is actually a good shot that follows some of these basic rules.
Image a tic tac toe board laying on top of you image, dividing your image in thirds horizontally and vertically. The four corners that are formed by the two horizontal and vertical lines are the places where you want the main interest to fall (or nearly fall) in your image. The above image has this, the hanging lights fall on the upper left corner. The fridge follows the horizontal line (another good thing). Make sure your image is level. The leaning of the fridge is hurting the image. If you cannot shoot it level, you can level it in GIMP.
I leveled it for you and rid some of the dead space above the fridge and left of the last cabinet (since I leveled the fridge, it threw the left cabinet out of level, so its really each their own, or split the difference)
One more thing, use the stuff on the countertops (cake plate, etc) to hide the outlets. The outlet is dead in the middle of the image, just above the faucet. It is hurting the image, it is trying to draw your eye into it because it is white.
I see exactly what you mean. Thanks for the tips. More reading to do.
Member
When your camera's sensor is evaluating the whole scene, and there are bright lights or bright light from windows etc your camera will want to crank down the exposure which will darken the woodwork etc. Try turning off the lights and take the picture when the light isn't so bright in the window. Use a tripod and an aperture of f11 or more and take a shot or two and look at the exposure. If it looks like the one you shot, try to bump up the exposure 1/3 of a stop at a time.
Junior Member
To use my speedlight off camera do I need to buy a wireless transmitter?
I have the older canon 430 ex.
Moderator
It should be triggered by the pop up flash on your camera. You can set it up to flash at the same time (two flashes) or the flash on your camera can flash 1/2 second early, triggering the speedlite to shoot when image is being taken. Pretty simple to set up but to long to explain. Google canon off camera speed lite video, it will show you. (I am not 100% sure your equipment will do this, tho)
"The worst thing about taking a great image is that your next one has to be better!"
Junior Member
Thanks, I look it up. I was fairly sure I had done it before. But couldn't get it going this time.
 Posting Permissions


 Reply With Quote
Bookmarks