A Week With A View — a day anyway :)

A friend of mine, Chris Penn, sent me an email ask­ing me to par­tic­i­pate in A Week With a View whereby we choose one image a day on Flickr and blog about why we think it’s beau­ti­ful. I’ve got a nutty week ahead so I can only play today, but it ‘s a great idea and I encour­age peo­ple to participate.

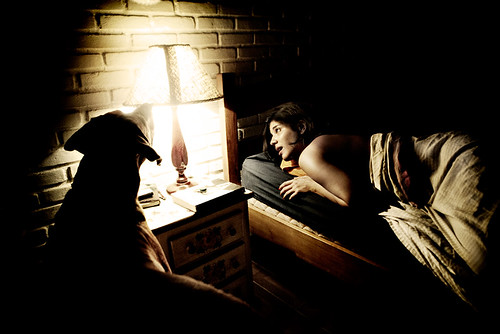
The photo I choose is called 0253 By Cia de Foto. Click the image to see it on flickr.

0253

For me, part of what makes an image beau­ti­ful is some type of story or the sug­ges­tion of a story. In this image the light is on but the woman looks star­tled. Did the light go on by itself?‚ Did the dog turn it on? What IS going on here? It’s left up to us but we are def­i­nitely engaged.

Another thing that I find beau­ti­ful (Ok it’s a bit tech­ni­cal but it’s my post :) ) is how our eye is beau­ti­fully guided. We go from light to girl to dog and go back and forth between the lit ele­ments. Our eye does not wan­der because the pho­tog­ra­pher is skill­fully guid­ing us.….and for me, it’s a thing of beauty.

and if you don’t accept that, then the star­tled girl is beautiful.

Signing’ your prints

When Picasso signed his paint­ings, he did so using his paint­brush and oils and gen­er­ally placed his sig­na­ture at the bot­tom right or left of his art pieces. So when ‘sign­ing’ a photo that you are selling/giving away, what can be done as an artist to label your work?


A nice idea is to place a sim­ple bor­der around the photo, and have your sig­na­ture and the photo’s title 1/8 of an inch below the photo. If not opt­ing for a bor­der, another idea would be to keep it ‘clean’ by plac­ing a sig­na­ture in the bot­tom right cor­ner of the photo itself. Keep in mind though that‚you want to keep the photo clear and not have your sig­na­ture or bor­der dis­rupt ele­ments in the photo.

Some pho­tog­ra­phers choose to sell their pho­tos with mats already attached, and some­times they sign the mat­ting and not the image. This seems silly IMO; after all the pho­tog­ra­pher cre­ated the image not the mat­ting so why sign the mat­ting? Also, the mat­ting can be sep­a­rated from the print and so the sig­na­ture or logo can get ‘lost’.

Some clients how­ever pre­fer not to have a border/signature/title ‘dis­rupt­ing’ their photo. In cases as such, you may want to con­firm with your client first prior to print­ing. As an alter­nate way to sign your prints, a stamp with your logo/signature on the back of the print may be a nice final touch.

For more info, feel free to check out the link on our pho­tog­ra­phy forum.

Signing’ your prints

When Picasso signed his paint­ings, he did so using his paint­brush and oils and gen­er­ally placed his sig­na­ture at the bot­tom right or left of his art pieces. So when ‘sign­ing’ a photo that you are selling/giving away, what can be done as an artist to label your work?


A nice idea is to place a sim­ple bor­der around the photo, and have your sig­na­ture and the photo’s title 1/8 of an inch below the photo. If not opt­ing for a bor­der, another idea would be to keep it ‘clean’ by plac­ing a sig­na­ture in the bot­tom right cor­ner of the photo itself. Keep in mind though that you want to keep the photo clear and not have your sig­na­ture or bor­der dis­rupt ele­ments in the photo.

Some pho­tog­ra­phers choose to sell their pho­tos with mats already attached, and some­times they sign the mat­ting and not the image. This seems silly IMO; after all the pho­tog­ra­pher cre­ated the image not the mat­ting so why sign the mat­ting? Also, the mat­ting can be sep­a­rated from the print and so the sig­na­ture or logo can get ‘lost’.

Some clients how­ever pre­fer not to have a border/signature/title ‘dis­rupt­ing’ their photo. In cases as such, you may want to con­firm with your client first prior to print­ing. As an alter­nate way to sign your prints, a stamp with your logo/signature on the back of the print may be a nice final touch.

For more info, feel free to check out the link on our pho­tog­ra­phy forum.

Photography.ca winning member images from May 2009

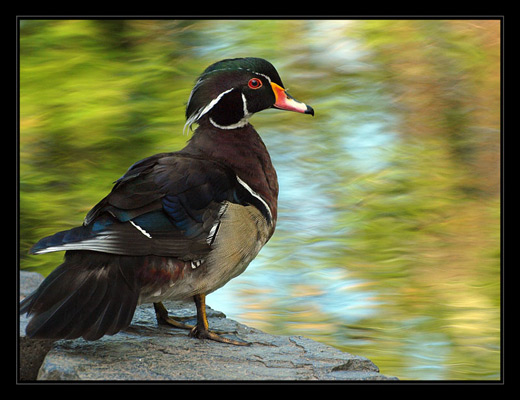
For the past few months we have added a new fea­ture on our pho­tog­ra­phy bul­letin board where the Admin on Photography.ca (Me, Marko), chooses 1 photo that he thinks is great and talks about the photo. This month I teetered hard between 2 images and in the end decided that they were both win­ners. Wood Duck by Michaelaw and Navy ‘LST 325′ by z-06-jim were my choices for this month. (check the pre­vi­ous link for the explanation).

We have lots of pho­tographs being sub­mit­ted each month on our forum for cri­tiques, assign­ments or just to show the photo. Choos­ing Michaelaw’s and z-06-jim’s photo as the ‹“win­nersž took many hours of care­ful sift­ing. Given that it took so long to choose, I came across many close con­tenders. Seems like a waste of time just to include 1 photo so Ižd like to include 4 hon­ourable men­tions right here.

If you havenžt joined our forum I would encour­age you to do so. We are an extremely friendly bunch that share and learn daily.

Herežs the win­ning photo by Michaelaw:

Wood Duck by Michaelaw

Herežs the win­ning photo by z-06-jim:

Navy ‘LST 325′ by z-06-jim


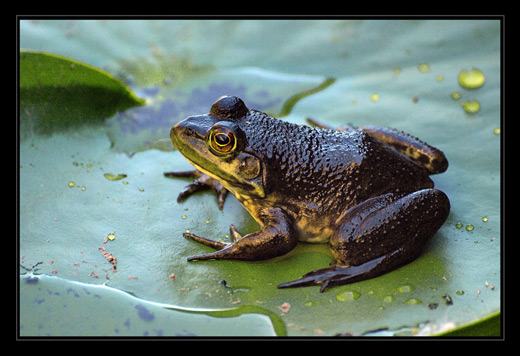
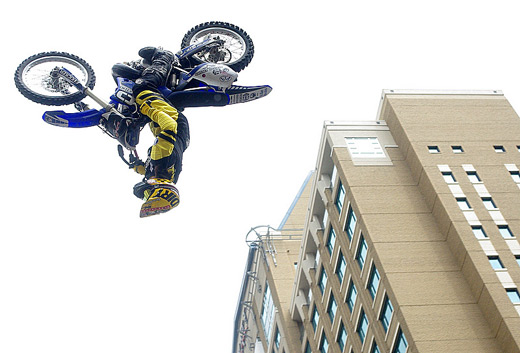
Here are the 2 hon­ourable men­tions in no par­tic­u­lar order:

Frog/Toad by Michaelaw

First Action Pics by casil403

Filters for lens protection

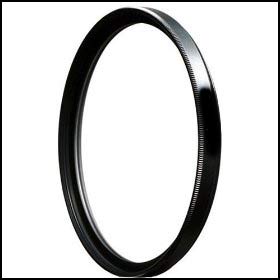
There is a great debate among pho­tog­ra­phers as to whether or not lens fil­ters need to be used for lens pro­tec­tion. Pho­tog­ra­phers are divided when it comes to fil­ters and image qual­ity. Many believe that adding a fil­ter to the lens reduces the image qual­ity while other pho­tog­ra­phers feel there are lit­tle to no effects to the photograph.


A fil­ter is not only used to‚protect against every day use. UV fil­ters offer pro­tec­tion against UV rays that may dam­age our lenses, and Sky­light fil­ters reduce the haze and clar­ify the photo. But really, are these truly nec­es­sary? Many pho­tog­ra­phers sug­gest that they have no notice­able effect in most cir­cum­stances. Lenses are made so strong today, that the ques­tion remains…“To use a fil­ter, or not to use a filter?”

Feel free to add your com­ments here or join our pho­tog­ra­phy forum and add to the con­ver­sa­tion. Here’s a link to the topic in the pho­tog­ra­phy forum.

Quality of Lenses

What real advan­tages are there when spend­ing extra money on an expen­sive lens over its cheaper counterpart?


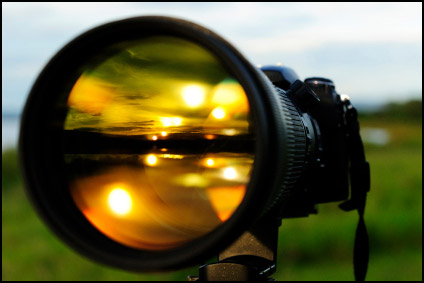
When com­par­ing pro lenses to the ‘cheaper’ lenses, the higher priced lenses deliver bet­ter qual­ity for the most part. Depend­ing on the lens you might also get expe­dited auto-focus, sharper images and less chro­matic aber­ra­tion.‚ Per­haps the biggest advan­tage though is with regard to aper­ture. More expen­sive lenses are often faster. This means that their largest F-stop (small­est num­ber eg. F1.8, F2.0, F2.8 etc) is usu­ally larger than cheaper lenses. Remem­ber, the larger the aper­ture, the more room you have to use a faster shut­ter speed. In addi­tion, the larger the lens’s aper­ture, the eas­ier it is to shoot in lower light because when you look through the viewfinder you are look­ing at a scene through the lens’s largest aper­ture. If a lens has a max aper­ture of F2.8, any scene you look at through your viewfinder will look BRIGHTER than if the lens’s widest aper­ture was F4.0. It makes no dif­fer­ence what F-stop you use dur­ing the actual expo­sure. This doesn’t make a dif­fer­ence in bright sun­light, but in makes a huge dif­fer­ence in low light where it is eas­ier to focus if the viewfinder is brighter. On the neg­a­tive side, higher priced lenses with larger aper­tures will often‚ buy you sig­nif­i­cantly more ‘weight’ as well.

When com­par­ing the results of pro lenses to the ‘mid-range’ priced lenses (pro-consumer level), there doesn’t seem to be a notice­able dif­fer­ence to many advanced pho­tog­ra­phers so long as the images are kept small. This is espe­cially true if the images are for Inter­net use only.

If you’re still skep­ti­cal and want to test the waters your­self, you can always take the same pic­ture using two dif­fer­ent lenses to prove a point. Or, an eas­ier route is to search the web for some­one who’s already taken the time to do it — much easier!

As a final point, when peo­ple (pho­tog­ra­phy newbies/hobbyists) ask me what cam­era to buy, they never ask about lenses which is a mon­ster mis­take. I ALWAYS coun­cil newbies/hobbyists to spend MORE on the lenses than the cam­era, espe­cially the first ‘expen­sive’ cam­era. This is because the cam­era is just a box with a flap to let light in. The LENS does all the focus­ing so a poor lens on an expen­sive cam­era will give you a poor result. A great lens on an aver­age cam­era will give you a great result (in the right hands of course ;) )
When you’re just learn­ing though you can eas­ily learn on a used or lower end DSLR that you’ll surely replace as tech­nol­ogy changes. The lenses though, you can keep those for decades. Trust me, spend the dough on the lenses.

Check out the link in our pho­tog­ra­phy forum for more info.

Removing Backgrounds from Images

So you’ve just taken the per­fect shot of a pair of shoes for a client. But wait… ooops. The client didn’t want the shoes to be on the table. So what can be done to remove the table? There are a few ways to go about it. First (and most obvi­ous) is to shoot the pair of shoes on a sim­ple back­drop with no distractions.


But if this is not pos­si­ble, Pho­to­shop can help you achieve that ‘near per­fect’ shoe shot by extract­ing it from the back­ground. Photoshop’s selec­tion tools work well to get the job done. The quick selec­tion tool is great for sim­ple extrac­tions. The back­ground eraser is another great tool. Although many peo­ple loved the extract tool in Pho­to­shop CS3, it’s miss­ing from CS4. (If you loved it and still have CS3, you can copy it from the CS3 Plug-ins-Filters folder to CS4).  But depend­ing on the sub­ject, these tools may miss out on some of the finer details like a model with frizzy hair. In cases like these, man­u­ally trac­ing the edges with the pen tool and then con­vert­ing it to a selec­tion is ideal. Tedious yes, but it will give you opti­mal results.

Plug­gins are also avail­able for remov­ing back­grounds if you’re up for the expense.
Who knew shoes could be so tech­ni­cal?!
Link from our Pho­tog­ra­phy forum

Removing Backgrounds from Images

So you’ve just taken the per­fect shot of a pair of shoes for a client. But wait… ooops. The client didn’t want the shoes to be on the table. So what can be done to remove the table? There are a few ways to go about it. First (and most obvi­ous) is to shoot the pair of shoes on a sim­ple back­drop with no distractions.


But if this is not pos­si­ble, Pho­to­shop can help you achieve that ‘near per­fect’ shoe shot by extract­ing it from the back­ground. Photoshop’s selec­tion tools work well to get the job done. The quick selec­tion tool is great for sim­ple extrac­tions. The back­ground eraser is another great tool. Although many peo­ple loved the extract tool in Pho­to­shop CS3, it’s miss­ing from CS4. (If you loved it and still have CS3, you can copy it from the CS3 Plug-ins-Filters folder to CS4).‚ But depend­ing on the sub­ject, these tools may miss out on some of the finer details like a model with frizzy hair. In cases like these, man­u­ally trac­ing the edges with the pen tool and then con­vert­ing it to a selec­tion is ideal. Tedious yes, but it will give you opti­mal results.

Plug­gins are also avail­able for remov­ing back­grounds if you’re up for the expense.
Who knew shoes could be so tech­ni­cal?!
Link from our Pho­tog­ra­phy forum

Composition in Photography

We all hear of cer­tain rules in pho­tog­ra­phy that one may want to abide by. It is not to say these rules are set in stone but if fol­lowed, nor­mally your pho­tos stand out that much more.


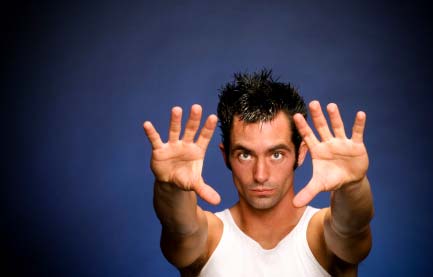
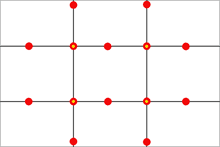
The ‘Rule of Thirds’ is used reg­u­larly by most advanced pho­tog­ra­phers. The rule states that an image should be imag­ined as divided into nine equal parts (like a tick tack toe board) by two equally-spaced hor­i­zon­tal lines and two equally-spaced ver­ti­cal lines, and that impor­tant com­po­si­tional ele­ments should be placed along these lines or their inter­sec­tions. The shot above is a good exam­ple. Most new­bies would have placed the model dead cen­ter in this image. The image works much bet­ter com­po­si­tion­al­ly  with the model to to right of cen­ter on one of the lines with the yel­low dot. Play with this ‘rule’ for your­self just to test it out.

Depth of Field (oth­er­wise known as DOF), is the area from the fore­ground to the back­ground within your photo that is in focus. A nar­row DOF (F-2.0 or F-2.8 for exam­ple) will allow the main sub­ject of your photo in be in focus while the back­ground is blurred. A wider DOF allows one’s eyes to wan­der over the whole image as there are more details that are in focus.

Other ‘rules’ to con­sider include lead­ing lines, fram­ing, fore­ground inter­est and more.

Orig­i­nal link from our Pho­tog­ra­phy forum

Composition in Photography

We all hear of cer­tain rules in pho­tog­ra­phy that one may want to abide by. It is not to say these rules are set in stone but if fol­lowed, nor­mally your pho­tos stand out that much more.


The ‘Rule of Thirds’ is used reg­u­larly by most advanced pho­tog­ra­phers. The rule states that an image should be imag­ined as divided into nine equal parts (like a tick tack toe board) by two equally-spaced hor­i­zon­tal lines and two equally-spaced ver­ti­cal lines, and that impor­tant com­po­si­tional ele­ments should be placed along these lines or their inter­sec­tions. The shot above is a good exam­ple. Most new­bies would have placed the model dead cen­ter in this image. The image works much bet­ter com­po­si­tion­ally‚ with the model to to right of cen­ter on one of the lines with the yel­low dot. Play with this ‘rule’ for your­self just to test it out.

Depth of Field (oth­er­wise known as DOF), is the area from the fore­ground to the back­ground within your photo that is in focus. A nar­row DOF (F-2.0 or F-2.8 for exam­ple) will allow the main sub­ject of your photo in be in focus while the back­ground is blurred. A wider DOF allows one’s eyes to wan­der over the whole image as there are more details that are in focus.

Other ‘rules’ to con­sider include lead­ing lines, fram­ing, fore­ground inter­est and more.

Orig­i­nal link from our Pho­tog­ra­phy forum

How to Create Sepia Tones

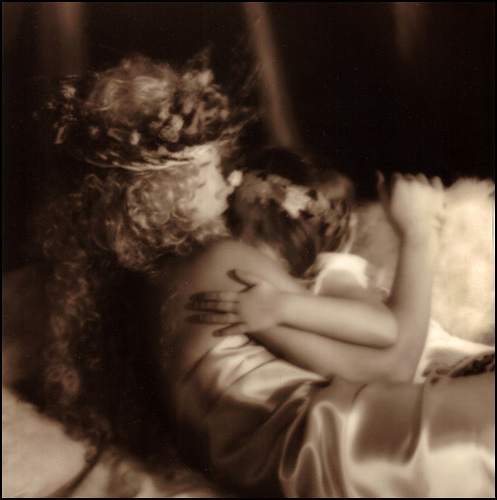
To add a cer­tain nos­tal­gic effect to pho­tos, many fine art pho­tog­ra­phers‚ enjoy chang­ing the colour of the pho­to­graph or actu­ally ton­ing the print to sepia. Using the dark­room to achieve your sepia effect is an option if you have the facil­i­ties avail­able. If not, you have two other options — an in cam­era option on many DSLRs and good old photoshop.

This image was printed in the darkroom and then toned in a sepia bath to get this rich brown colour.

Venus and Cupid by Marko Kulik — This image was printed in the dark­room and then toned in a sepia bath to get this rich brown colour.


Many dig­i­tal cam­eras now offer you the option of tak­ing the image in sepia (and other tones as well like blue, red, green etc.) This is quick and effi­cient for imme­di­ate results. It does have it’s lim­i­ta­tions though, like los­ing all of the colour infor­ma­tion in the image. This is why most pho­tog­ra­phers like to ‘play around’ with their photo in photoshop.

Pho­to­shop not only allows the option of con­vert­ing to sepia, but it fur­ther allows a whole range of brown/orange tones to choose from. Some artists pre­fer a more muted sepia, while oth­ers pre­fer it to appear more dras­tic. Either way, there is really a vast array of tones to choose from.

What­ever the method, just make sure of one thing — save an orig­i­nal copy of your photo just in case you decide that sepia wasn’t for you after all.

Here’s the link from our Pho­tog­ra­phy forum

Photography.ca winning member images from April 2009

For the past few months we have added a new fea­ture on our pho­tog­ra­phy bul­letin board where the Admin on Photography.ca (Me, Marko), chooses 1 photo that he thinks is great and talks about the photo. The pen­guin photo below titled A zoo more by Siejones was my choice for this month. (check the pre­vi­ous link for the explanation).

We have lots of pho­tographs being sub­mit­ted each month on our forum for cri­tiques, assign­ments or just to show the photo. Choos­ing Siejones’s photo as the ‹“win­nerž took many hours of care­ful sift­ing. Given that it took so long to choose, I came across many many many close con­tenders. Seems like a waste of time just to include 1 photo so Ižd like to include 4 hon­ourable men­tions right here.

If you havenžt joined our forum I would encour­age you to do so. We are an extremely friendly bunch that share and learn daily.

Herežs the win­ning photo by Siejones:

A zoo more by Siejones


Here are the 4 hon­ourable men­tions in no par­tic­u­lar order:

A Mallard’s Por­trait by Michaelaw

A Walk On Deck by Lovin

Cloud bank BW by Barefoot

Gui­tarist by AcadieLibre