Page 1 of 3 123 LastLast
Results 1 to 10 of 23

Post Processing Sharpening - the Mad way!

This is a discussion on Post Processing Sharpening - the Mad way! within the Photoshop - graphics programs - pluggins - for photography forums, part of the Education & Technical category; I was asked recently if I wouldn't mind walking a few members here through how I go about sharpening my ...

  1. #1
    Mad Aussie's Avatar
    Mad Aussie is offline Moderator
    Join Date
    Dec 2008
    Location
    Brisbane, Qld, Australia
    Posts
    14,098
    My Photos
    Please ask before editing my photos

    Default Post Processing Sharpening - the Mad way!

    I was asked recently if I wouldn't mind walking a few members here through how I go about sharpening my images when I find that necessary.

    What follows below is the way I go about this task. This is not the only way, neither do I suggest it's the best or right way. It's just what I do for reasons that should become apparent as you read through.

    I should say that I do usually leave my sharpening to last or at least one of the final parts of my post processing. No point concerning myself with sharpening parts of an image I will later crop out or sharpening up artifacts, dust etc that need to be removed, cloned etc.

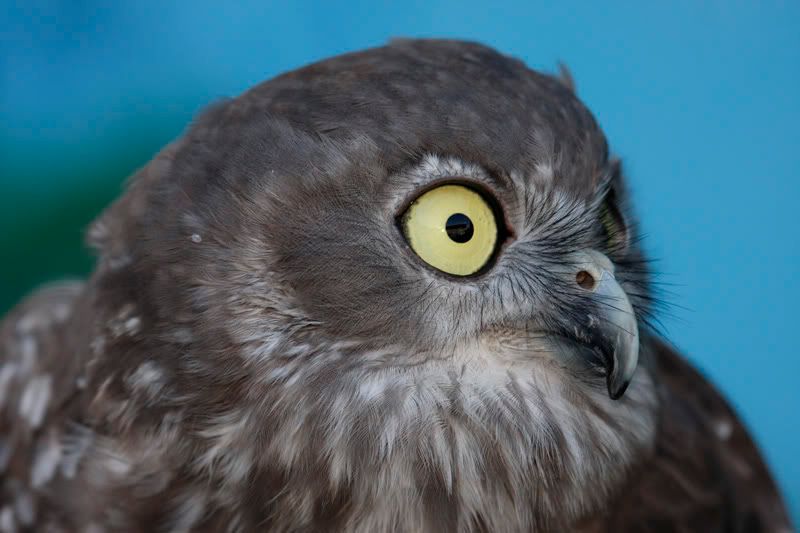
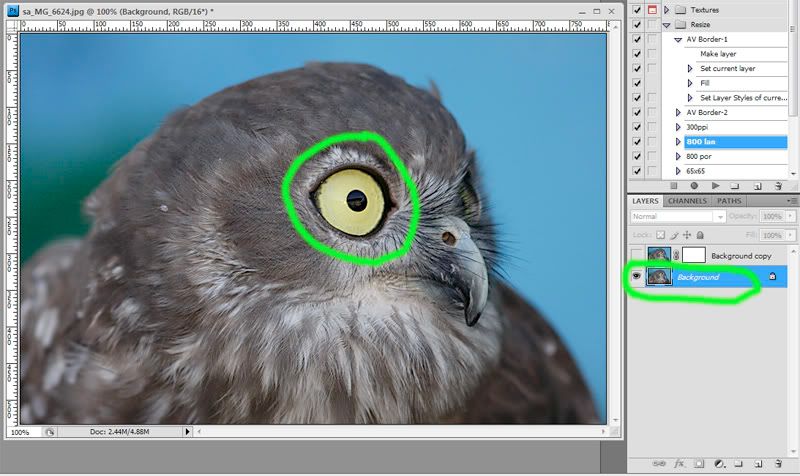
    So ... here's our image ...


    You'll notice the whole owl is a little soft. Look carefully at his eye. That's definitely too soft for my liking and that's what we will concentrate on here.


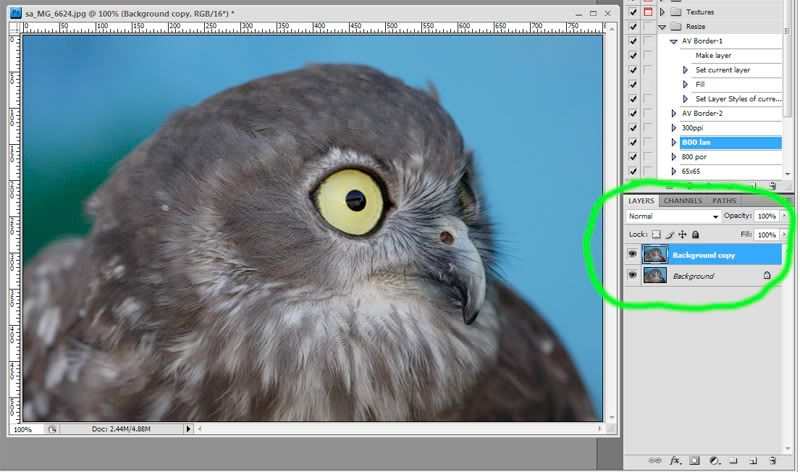
    Step 1 - Duplicate the layer
    In this screenshot I have highlighted the Layers Palette in Photoshop. You can see 2 layers there. One is the original image and the 2nd is a duplicate of that layer. They are therefore Identical.
    Use the tabs Layers/Duplicate layer to achieve this.


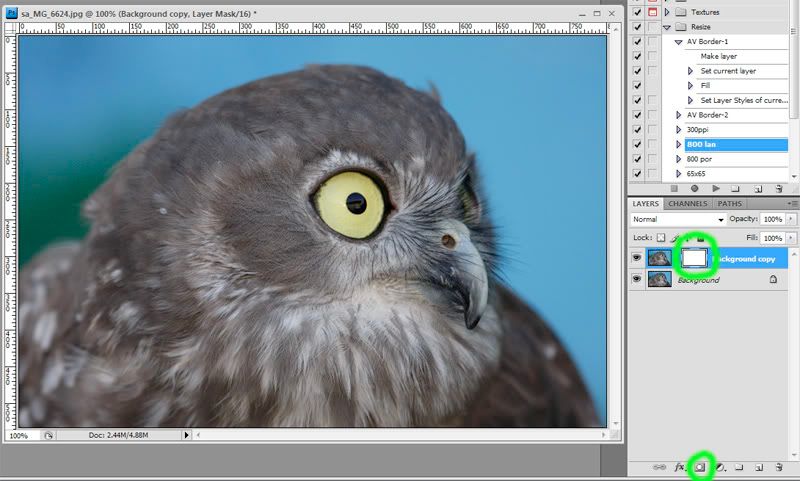
    Step 2 - Make a Layer Mask

    In this shot I have highlighted the layer mask at the bottom of the layers palette and also the layer itself which shows up as a white box next to the image layer.
    To achieve this simply select the top layer in the palette and click that layer mask button at the bottom.


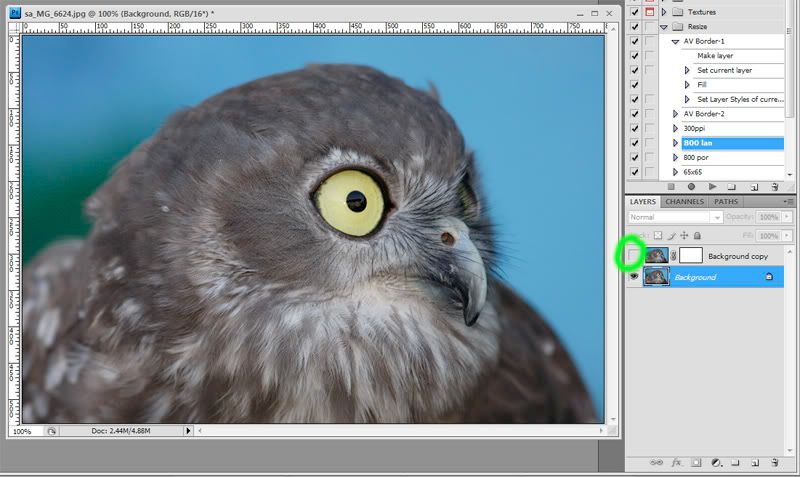
    Step 3 - Selecting the lower layer
    What I'm going to do is sharpen the lower layer and use the layer mask on the upper layer to allow us to see through to the bottom layer. Think of two identical photos, one on top of the other. You get scissors and cut out the eye of the owl on the top photo. Now you see the eye of the owl on the bottom photo only. Any changes you make to that bottom layer will only show through the hole in the layer mask we'll create soon. Believe it or not, this is how some photographers like Ansell Adams used to do post process some of their works by cutting negatives in a similar way.
    So .. to select the lower layer, first click on the 'eye' that I've highlighted by the top layer in the layer palette. This turns that layer off so we can see the layer below properly for the time being.
    Make sure you have selected the lower layer also by clicking on it.


    Step 4 - Sharpening the eye
    I've highlighted the owls eye in this shot to illustrate that I don't care what happens to the rest of the bird at all when I sharpen now. I only care what that eye looks like. Remember, when we turn on that top layer the eye is all that will be visible through the 'hole.'
    Now use you favoured method of sharpening. I use unsharp mask most of the time. You may prefer smart sharpen for instance and that's fine.
    Sharpen that eye to the level you are most happy with. Don't worry if it creates artifacts or makes the feathers etc look crappy.


    Step 5 - Using the Layer Mask
    Here's the cool bit. The Layer Mask. Turn on the top layer again by clicking that little eye icon.
    Select the layer Mask by clicking on the highlighted white box that is the Layer Mask. A white border should appear to show you have selected it.
    Now ... to cut a 'hole' (or erase parts of that top layer) you use a black brush. So using the brush tool, select black, choose the flow you want ( I use about 30% so it takes a few passes to get full black) and paint over the eye. As you do so, you'll notice the eye getting sharper because the bottom layer is starting to show through where you paint.
    If you make a mistake or change your mind about how much you painted, simply select white and paint back over and the mask will be put back.
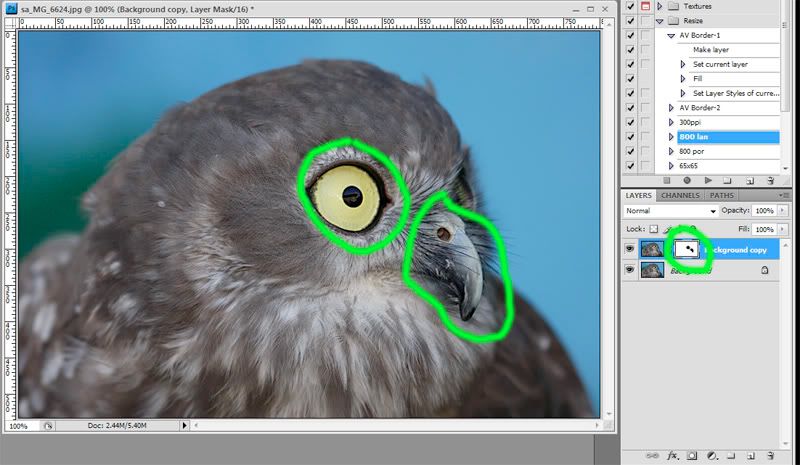
    You'll notice, by my highlighting, that I chose to paint over both the eye and the beak.
    Also ... if you look at your layer mask (white box) you'll see the shape of what you painted in black. You can see the eye and beak in my mask in my highlight.


    Step 6 - Finishing up
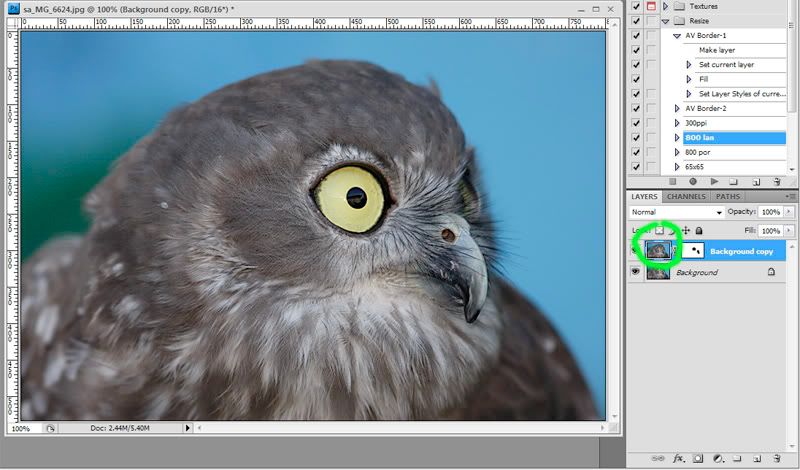
    In this shot you can see I've highlighted the top layer again.
    The reason for that is I decided I might sharpen the rest of the owl now, just a little. So I select the top layer as highlighted and applied an unsharp mask to a small degree but not enough to take away that soft feel to the feathers.


    And that's it! Flatten the image and save it as needed.

  2. #2
    Mad Aussie's Avatar
    Mad Aussie is offline Moderator
    Join Date
    Dec 2008
    Location
    Brisbane, Qld, Australia
    Posts
    14,098
    My Photos
    Please ask before editing my photos

    Default

    Here's the finished product ...


    And the original again to compare ...

  3. #3
    zenon5940 is offline Senior Member
    Join Date
    Aug 2009
    Location
    Joliette Qc Canada
    Posts
    353
    My Photos
    Please feel free to edit my photos
    Critiques
    Critique my photos anywhere in the forum

    Default

    Thanks MA for this demonstration. You explain real well the process and the illustrations help understand. You sure have an eye for little details.

    Thank you.

    Clement

  4. #4
    EJC
    EJC is offline Senior Member
    Join Date
    Oct 2008
    Location
    Calgary, Alberta
    Posts
    389
    My Photos
    Please feel free to edit my photos

    Default

    Ditto here too MA. This is very helpful and easy to follow. Thanks!

    cheers

  5. #5
    kat
    kat is offline Senior Member
    Join Date
    Jan 2009
    Location
    Vancouver
    Posts
    4,329
    My Photos
    Please ask before editing my photos
    Critiques
    Only critique photos posted in the critique forum

    Default

    Yay! Thanks so much MA!
    My new blog as of Nov/10
    http://katchickloski.wordpress.com/

  6. #6
    Mad Aussie's Avatar
    Mad Aussie is offline Moderator
    Join Date
    Dec 2008
    Location
    Brisbane, Qld, Australia
    Posts
    14,098
    My Photos
    Please ask before editing my photos

    Default

    Hope it helps all.

  7. #7
    AntZ's Avatar
    AntZ is offline Senior Member
    Join Date
    Mar 2009
    Location
    Australia
    Posts
    2,290
    My Photos
    Please feel free to edit my photos
    Critiques
    Critique my photos anywhere in the forum

    Default

    Thanks MA.
    Certainly not something you would want to do to every image. I wonder how the result would differ from selective sharpening available is something like lightroom?

  8. #8
    Mad Aussie's Avatar
    Mad Aussie is offline Moderator
    Join Date
    Dec 2008
    Location
    Brisbane, Qld, Australia
    Posts
    14,098
    My Photos
    Please ask before editing my photos

    Default

    Quote Originally Posted by AntZ View Post
    Thanks MA.
    Certainly not something you would want to do to every image. I wonder how the result would differ from selective sharpening available is something like lightroom?
    I find the lightroom method very clumsy myself.

    The added advantage with this method I use is that while you have the two layers you can also be more selective with the saturation. For example, I could have saturated the eyes on the lower layer or even changed their colour entirely if I really wanted. Not that I'd do that to a bird.

    Not every images needs this sharpening of course. Some of my shots need nothing, some just a little overall, and some need this method whether it be needed or just my taste.

  9. #9
    Greg_Nuspel's Avatar
    Greg_Nuspel is offline Senior Member
    Join Date
    Jan 2009
    Location
    Calgary
    Posts
    1,947
    My Photos
    Please ask before editing my photos

    Thumbs up

    MA excellent method, thanks for sharing your knowledge.
    --Greg Nuspel

    I've been sucked into the void of video!!!!!!!

    Flickr

    Vimeo

  10. #10
    Mad Aussie's Avatar
    Mad Aussie is offline Moderator
    Join Date
    Dec 2008
    Location
    Brisbane, Qld, Australia
    Posts
    14,098
    My Photos
    Please ask before editing my photos

    Default

    You're welcome Greg.

Page 1 of 3 123 LastLast

Bookmarks

Posting Permissions

  • You may not post new threads
  • You may not post replies
  • You may not post attachments
  • You may not edit your posts
  •  

1 2 3 4 5 6 7 8 9 10 11 12 13 14 15 16 17 18 19 20 21 22 23 24 25 26 27 28 29 30 31 32 33 34 35 36